Daniel sent us this one — he's looking at the problem of making a rental with a dumb window AC unit into a climatically comfortable home when you've got a one-year-old in the house. The hardware side is actually cheap now. You can get an ESP32-based temperature and humidity sensor for under five dollars, an infrared blaster for about fifteen. The barrier isn't hardware anymore. It's understanding how thermostats actually think — the algorithms under the hood that decide when to kick on and when to stay quiet. Get that wrong and you've got a machine fighting itself all night while the baby wakes up every forty minutes.

This is the thing most people never touch. They buy a Nest or whatever, mount it on the wall, set it to twenty-two, and walk away. But when you're building the loop yourself in Home Assistant — sensor on the wall, IR blaster pointed at a dumb AC unit — you have to decide what "twenty-two" actually means in terms of behavior. How close is close enough? How often should the compressor cycle? What counts as an acceptable temperature swing? Those aren't questions the Nest asks you because it's already made those decisions for you, and you can't change them.
Right, which is the quiet irony here. The "dumb" AC plus smart sensors gives you more control than the smart AC that locks you out of its own logic. Daniel's asking about comfort parameters — what temperature and humidity to target, expressed in Celsius — but he's also asking the deeper question, which is how to make the system behave itself while it chases those numbers.
That's where the algorithm choice becomes the whole game. You can have perfect sensors, perfectly placed, reporting every thirty seconds — and still end up with a system that short-cycles the compressor six times an hour, fails to dehumidify, and drives everyone in the house insane with the constant clicking on and off. The sensor data is only as good as the logic that acts on it.
The episode really has three layers. One, what does "comfortable" actually mean in hard numbers for a home with an infant — because the pediatric guidelines are tighter than what adults tolerate. Two, how to wire up the hardware in Home Assistant, which is straightforward enough. And three, the hidden layer — the thermostat control algorithms that most people install once and never look at again, but that determine whether your system hums or hunts.
Let's start with the numbers, because "comfortable" is one of those words that sounds obvious until you try to define it. For adults, the standard reference is ASHRAE Standard 55 — that's the American Society of Heating, Refrigerating and Air-Conditioning Engineers. They recommend twenty to twenty-four degrees Celsius, with relative humidity between thirty and sixty percent. That's a pretty wide band, and most adults can tolerate the full range without complaint.
A one-year-old can't.
The American Academy of Pediatrics narrows that substantially for infants under twelve months. They recommend twenty to twenty-two degrees Celsius, and forty to sixty percent relative humidity. The temperature band is tighter because babies have a much harder time thermoregulating — their sweat glands aren't fully developed, their surface-area-to-body-mass ratio is higher, so they lose heat faster and gain it faster. And the humidity floor is higher because dry air irritates their respiratory tract. There was a study in the Journal of Perinatology in twenty twenty-four that found a correlation between room temperatures above twenty-four degrees Celsius and elevated SIDS risk. That's not a casual recommendation — it's a safety parameter.
The target window for the nursery is basically twenty to twenty-two degrees and forty to sixty percent humidity. That's the spec. And the AC has to hold that through the night while outdoor temperatures drop, while the room's thermal load changes, without waking the kid up.
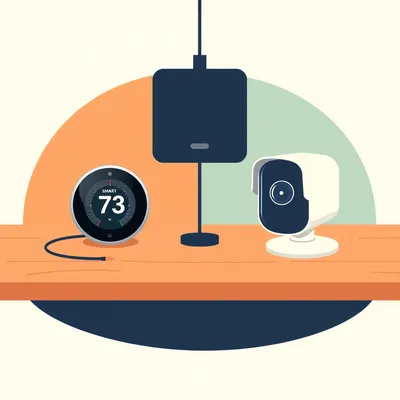
Which brings us to the hardware, because until about two years ago, instrumenting every room was still kind of expensive. Now it's trivial. An ESP32 board with a BME280 sensor — that measures temperature, humidity, and barometric pressure — costs about eight dollars per room. You flash ESPHome onto it, it shows up in Home Assistant, and you've got temperature and humidity readings updating every thirty seconds. Pair that with a BroadLink RM4 Pro infrared blaster for about twenty-five dollars, and you can send the same IR codes your AC's remote sends. Home Assistant's Generic Thermostat integration ties them together — it reads the sensor entity, and when it decides cooling is needed, it fires the IR command to the blaster.
This is where the algorithm problem bites. Generic Thermostat uses a simple on-off hysteresis by default. You set a target temperature — say twenty-two degrees — and a hysteresis value, which is the deadband around that target. If hysteresis is set to zero point five, the AC kicks on at twenty-two point five and off at twenty-one point five.
That sounds reasonable on paper. The problem is what happens when you tighten that hysteresis. A lot of people think, I want the room at exactly twenty-two, so I'll set the hysteresis to zero point one or zero point two. What they've actually done is told the system to turn the AC on the moment the temperature drifts a tenth of a degree above the target, and off the moment it drifts a tenth below. In a real room with thermal mass, that means the AC cycles on and off every three to five minutes.
Which is terrible for the compressor.
Industry standard says compressor wear is minimized at fewer than six cycles per hour. If you're cycling twelve times an hour — which is what you get with a hysteresis of zero point two — you're cutting the lifespan of that unit dramatically. But it's worse than that. An AC unit doesn't just cool the air. It dehumidifies by running the coil cold long enough for water vapor to condense and drain. That takes time — at least ten minutes of continuous runtime for meaningful dehumidification to happen. If the compressor is only running for three minutes at a stretch, the coil never gets cold long enough to pull moisture out. So the air feels clammy, the temperature reads correctly on the sensor, and everyone's uncomfortable but nobody can figure out why.
The small hysteresis that was supposed to give you precision actually gives you the worst of both worlds — compressor wear, noise, and a room that's cool but sticky.
The noise component isn't trivial when you've got a one-year-old. A window AC cycling on and off every four minutes is a sleep disruption machine. The compressor kicks on with a thunk, the fan ramps up, the whole thing vibrates — and then three minutes later it shuts off, the room goes quiet, and the temperature starts drifting again. The baby's sleep cycle is about fifty to sixty minutes. If the AC is interrupting that cycle every few minutes during the light-sleep phase, you're going to have a very bad night.
What's the right hysteresis for a nursery?
It depends on the room and the AC, but a starting point of one degree Celsius is reasonable. That means if your target is twenty-two, the AC kicks on at twenty-three and off at twenty-one. That gives you a two-degree swing band, which sounds wide, but in practice the temperature moves slowly enough that you're within the AAP's recommended range almost all the time. And the compressor runs for fifteen to twenty minutes per cycle, which gives it time to dehumidify and keeps the cycle count around three or four per hour.
If someone wants tighter control than a two-degree swing?
Then you leave hysteresis behind entirely and move to PID control. That's proportional-integral-derivative — a control algorithm that doesn't just react to crossing a threshold, but continuously calculates how far you are from the setpoint, how long you've been away from it, and how fast you're moving toward or away from it. Instead of binary on-off, it modulates. The P term responds to the current error — the gap between actual temperature and target. The I term accumulates past error over time, so it eliminates that steady-state offset where the room settles half a degree above the target and stays there. The D term looks at the rate of change and predicts where the temperature is heading, which prevents overshoot.
Home Assistant's Generic Thermostat doesn't do this natively.
It doesn't, but there's a PID Climate Controller blueprint by Frenck available in the Home Assistant Community Store — HACS — that implements it. You install the blueprint, point it at your temperature sensor and your IR blaster switch, and tune three parameters: Kp, Ki, and Kd. The default values are Kp equals ten, Ki equals zero point five, Kd equals zero point one. Those work for most residential setups. The tuning logic is intuitive: if the AC overshoots and the room gets too cold, reduce Kp. If the temperature oscillates — goes above, then below, then above the setpoint — increase Kd to dampen those oscillations. If the system never quite reaches the setpoint and hovers a few tenths of a degree above it, increase Ki to eliminate that offset.
PID gives you tighter control without the short-cycling. But there's still the humidity problem.
Right, because temperature-only control ignores what humidity does to perceived comfort. At twenty-two degrees Celsius and sixty percent relative humidity, the heat index says it feels like twenty-four degrees. At twenty-two degrees and thirty percent humidity, it feels like twenty degrees. Same thermostat reading, completely different experience. For an infant, who's more sensitive to both heat stress and respiratory irritation from dry air, you need to manage both variables.
The fix is a dew point automation.
Dew point is the temperature at which water vapor condenses — it's a single number that captures both temperature and humidity. A dew point of thirteen degrees Celsius corresponds to roughly sixty percent relative humidity at twenty-two degrees. You create a template sensor in Home Assistant that calculates dew point from your BME280's temperature and humidity readings. Then you add a condition to your thermostat automation: cool the room not just when the temperature exceeds the setpoint, but when the dew point exceeds thirteen degrees. This way, on a cool but humid day — say twenty degrees and seventy percent humidity — the AC still runs to pull moisture out of the air, even though the temperature is technically below the cooling threshold.
That's the kind of logic you can't program into an off-the-shelf thermostat. Which brings us back to Daniel's core insight — the dumb AC plus smart controller is the better product.
It's not close. A five-hundred-dollar smart AC has a fixed hysteresis you can't change, no humidity integration, and certainly no multi-room coordination. A two-hundred-dollar dumb window unit plus thirty dollars in sensors and a Home Assistant instance gives you PID control, dew-point-triggered dehumidification, and the ability to follow the baby from room to room.
Which is the next piece — multi-room coordination. If you've got sensors in every room, you can create a "follow the baby" automation. During nap time and overnight, the thermostat target shifts to the nursery sensor. During the day, it reverts to the living room sensor. You use Home Assistant's min-max sensor to aggregate: set the AC to cool until the hottest room reaches the setpoint, or heat until the coldest room reaches the setpoint. That solves the classic problem of the thermostat being in the hallway while the nursery is three degrees warmer.
There's a case study that made the rounds in the Home Assistant community last year — a listener in Atlanta, summer twenty twenty-five, used dew-point control with a PID blueprint to manage a nursery. They reduced AC runtime by twenty-two percent while keeping the room at twenty-two degrees and fifty percent humidity. The AC cycled four times per hour instead of eight, and the baby slept through the night. That's the difference between a system that's technically functional and one that's actually good.
The actionable checklist for someone in Daniel's position — rental, dumb AC, one-year-old, Home Assistant already running — looks like this. Step one: start with Generic Thermostat and a hysteresis of one degree Celsius. It's not perfect, but it won't destroy your compressor while you tune everything else. Step two: put a BME280 in the nursery, get it reporting to Home Assistant, and create a dedicated climate entity for that room. Step three: install the PID Climate Controller blueprint from HACS and start with the default gains — Kp ten, Ki zero point five, Kd zero point one. Step four: add a dew point template sensor and set a threshold of thirteen degrees to trigger dehumidification mode.
One gotcha to watch for — if your window AC unit has its own built-in thermostat, the IR blaster and the AC's internal sensor will fight each other. The AC thinks the room is one temperature, Home Assistant thinks it's another, and the system oscillates between the two. The fix is inelegant but effective: point the IR blaster at the AC's receiver, then cover the AC's built-in temperature sensor with tape so it only reads the external sensor's commands.
That's the kind of detail that doesn't make it into the marketing copy.
It never does. But it's what separates a system that works from one that's constantly undermining itself.
We've covered the comfort parameters — twenty to twenty-two degrees, forty to sixty percent humidity for the nursery — and the hardware stack, and the algorithm choice. But the real takeaway here is that the algorithm is the product. The sensors are commodity hardware. The IR blaster is a commodity. The thing you're actually building when you set this up is a control loop, and the quality of that loop determines whether your home feels comfortable or whether you're just constantly aware of the machines fighting the physics of the room.
That's where Home Assistant's flexibility becomes the killer feature. A Nest makes those algorithm decisions for you and hides them. Home Assistant exposes them and lets you tune them. For most people, that's intimidating. For someone who's willing to spend an afternoon tuning PID gains and setting up a dew point template, it means you can make a hundred-dollar window unit behave better than a thousand-dollar smart system.
Which is exactly the kind of upside-down economics that makes this whole space interesting. The expensive product locks you out. The cheap product, with the right software, gives you more.
Yet, most people running Home Assistant never touch the algorithm layer at all. They set up the Generic Thermostat integration, point it at a sensor and a switch, and walk away. Which is fine if you live alone and don't mind temperature swings. But the moment you add a one-year-old to the equation, the defaults stop being good enough.
Because the defaults are designed for a different problem. Generic Thermostat's out-of-the-box behavior assumes you want simple on-off control with a hysteresis of half a degree, and that the AC unit is a black box you don't need to think about. It's the thermostat equivalent of a light switch — functional, but dumb.
The thing is, the UI in Home Assistant makes it look complete. You see the thermostat card, you see the temperature reading, you can drag the setpoint up and down. It feels finished. But what you're actually looking at is the top layer of a system where the most important decisions — when to cycle, how long to run, whether to account for humidity — are happening in a few lines of YAML you probably haven't opened.
This episode is for the person who's already got Home Assistant running, already owns a BroadLink or a SwitchBot blaster, and has stared at that thermostat card wondering why the nursery feels off even though the number says twenty-two. We're going to walk through what's actually happening under the hood and how to tune it.
I think the reason this is harder than buying a Nest is worth naming explicitly. A Nest has one job: keep a single room at a single temperature, as measured by a single sensor, using a proprietary algorithm you can't inspect or modify. That works for a childless couple in a one-bedroom apartment. It breaks down when you need multi-room awareness, humidity compensation, and the ability to prioritize one room's conditions over another's based on time of day and who's sleeping in it.
The Nest also assumes you're willing to trust its black box. And to be fair, for a lot of people, that trust is earned — it mostly works. But "mostly" isn't good enough when the stakes are a baby's sleep quality and safety. You need to be able to see the logic and change it.
Let's open it. The first thing to understand about hysteresis is that it's not a precision knob — it's a stability mechanism. When you set hysteresis to zero point five, you're telling the system "I'm willing to accept a one-degree band of temperature drift before you do anything." That band is what gives the compressor time to run a full cycle, shut off, and let the room's thermal mass do its work before the next cycle begins.
If you shrink that band too much, the system never gets a chance to settle. The room warms up half a degree, the AC kicks on, it cools the air near the sensor in two minutes, the AC shuts off, the walls and furniture radiate heat back into the room, the sensor reads a half-degree rise, and the whole thing repeats.
That's exactly the physics of it. The sensor is measuring air temperature, not the thermal mass of the room. Air temperature changes fast. The walls, the crib, the floor — those change slowly. So when the AC blasts cold air at the sensor for three minutes, the sensor says "we're at twenty-one point five, shut it off." But the walls are still radiating the heat they absorbed during the day. Within four minutes, the air is back up to twenty-two point five, and the cycle repeats. You're not controlling the room — you're controlling the air directly in front of the sensor.
Which is why the dehumidification fails too. The coil needs ten-plus minutes of continuous cold to start condensing water. If it's only running for three minutes, the coil gets cold but never cold long enough for meaningful condensation. The water just sits on the coil and evaporates back into the room when the compressor shuts off.
You end up with a room that's technically the right temperature but feels wrong. The humidity creeps up cycle by cycle, and because the AC is running so frequently, you'd think it's doing its job. But it's actually making the humidity problem worse — every short cycle re-evaporates the water that condensed in the previous cycle. It's a humidity pump.
The real-world test you mentioned — hysteresis at zero point two, twelve cycles per hour — that's not just bad for the compressor. It's actively humidifying the nursery.
And the listener who ran that test found that bumping hysteresis to one degree dropped it to three cycles per hour, with temperature swinging between twenty-one and twenty-three. For an adult bedroom, that's fine. For the nursery, it's borderline — twenty-three is still within the AAP's range, but you're brushing up against it. The baby's room really wants that tighter band, which is why PID becomes the next step.
Before we get to PID, the hysteresis lesson is worth sitting with, because it's counterintuitive. Most people assume tighter control means better performance. In a thermostat, tighter control means the system fights itself until something breaks.
The compressor doesn't care about your target temperature. It cares about how many times per hour it has to start up. Every startup is a surge of current through the windings, a pressure spike in the refrigerant loop, and a mechanical jolt to the bearings. Below six cycles per hour, you're within design spec. Above that, you're trading compressor lifespan for a number on a screen.
You're destroying the hardware to chase a measurement that's being distorted by the hardware.
That's the thermostat trap in one sentence.
If hysteresis is the blunt instrument, PID is the scalpel. And the reason it works so well for this exact problem is that it doesn't think in binary on-off terms. It thinks in degrees of effort.
Which is interesting because the AC itself is still binary — it's either running or it isn't. You can't tell a window unit to run at sixty percent.
Right, and that's the clever part. PID handles a binary output by modulating duty cycle — the proportion of time the AC runs within a given window. Instead of "on at twenty-two point five, off at twenty-one point five," PID calculates a control output continuously. If the room is at twenty-two point one and the target is twenty-two, the P term says the error is small, so run the AC briefly. If the room has been at twenty-two point three for ten minutes, the I term accumulates that persistent error and says run it longer. If the temperature is dropping fast toward twenty-one point eight, the D term sees the trend and says back off now, before we overshoot.
The AC still clicks on and off, but the pattern is smarter — longer runs when needed, longer rests when the room is stable.
The result is that temperature holds within about plus or minus zero point three degrees instead of plus or minus one, while cycling far less often than a tight hysteresis would. You get the precision without the compressor abuse.
Which brings us to the humidity wrinkle, because even perfect temperature control leaves the other half of comfort unaddressed.
For a one-year-old, humidity might actually matter more than temperature. Here's why. A baby's respiratory tract is still developing — the mucosal lining is thinner, the airways are narrower. Dry air, below about thirty-five percent relative humidity, dries out those membranes and makes the baby more susceptible to respiratory infections. But high humidity, above sixty percent, promotes mold growth and dust mites, both of which are asthma triggers. And on top of that, humid air holds more heat against the skin, so a room at twenty-two degrees with sixty-five percent humidity feels several degrees warmer than the thermostat says.
Which is the heat index effect you mentioned — twenty-two degrees at sixty percent humidity feels like twenty-four.
And the baby can't tell you they feel clammy. They just don't sleep, or they get fussy, or in the worst case they overheat. The AAP's humidity recommendation of forty to sixty percent isn't a comfort guideline — it's a respiratory health parameter.
The dew point automation is how you enforce that parameter without buying a separate dehumidifier.
It's surprisingly simple to implement. Dew point is a derived value — there's a formula that takes temperature and relative humidity and spits out the temperature at which condensation would form. You don't need to know the formula. Home Assistant has a template sensor type that calculates it for you. You create a sensor called nursery_dew_point, feed it the BME280's temperature and humidity, and it updates every thirty seconds. Then you add a condition to your PID automation: if dew point is above thirteen degrees, the AC runs regardless of whether the temperature has hit the cooling threshold.
Thirteen degrees dew point being the magic number because that's roughly sixty percent relative humidity at twenty-two degrees.
And the beauty of using dew point instead of relative humidity directly is that dew point is independent of temperature. Relative humidity changes as temperature changes — warm the air, RH drops, even though the actual moisture content hasn't changed. Dew point is absolute. If the dew point is thirteen, the air has a specific amount of water vapor in it, period. So your automation doesn't get confused by temperature fluctuations.
Which means on a cool, damp night — say it's nineteen degrees outside and raining, and the nursery is twenty degrees with seventy percent humidity — the AC still runs. Not because the room is too warm, but because the air is too wet. And the baby benefits even though the thermostat number never triggered.
That's the Atlanta case study in practice. The listener there was dealing with exactly that — Atlanta summers where the temperature is moderate at night but the humidity sits at eighty percent. Their AC was barely running on temperature alone, and the nursery felt like a swamp. Adding the dew point trigger cut the humidity from sixty-five percent to fifty percent, and the baby's sleep improved within two nights.
Now we've got PID holding temperature tight and dew point handling humidity. But there's still the multi-room problem. One AC unit, one nursery, one living room, and a baby who moves between them.
This is where Home Assistant's sensor aggregation becomes genuinely powerful. You've got a BME280 in every room — they cost eight dollars each, so there's no reason not to. During the day, the baby is in the living room. During nap time and overnight, the baby is in the nursery. You create an automation that swaps which sensor the PID controller reads based on a schedule or a manual toggle. At seven PM, the input switches to nursery_temperature and nursery_dew_point. At seven AM, it switches back to living_room_temperature.
The min-max sensor handles the case where you need to protect the coldest or hottest room.
If you've got one AC cooling multiple rooms, the thermostat in the hallway might read twenty-two while the west-facing nursery is baking at twenty-five because it gets afternoon sun. You create a min-max sensor that takes the maximum temperature across all room sensors, and you feed that to the PID controller. The AC runs until the hottest room hits the setpoint. The other rooms might get a little cooler than ideal, but the room that matters — the one with the crib — is guaranteed to be in range.
Which is exactly the kind of logic no off-the-shelf thermostat can do. A Nest reads one sensor in one location. It has no idea the nursery exists.
This is the answer to the question Daniel's prompt is really asking. Why build your own thermostat when you can buy one? Because the bought one solves the general case — keep one room at one temperature. The built one solves the specific case — keep the nursery at twenty-two degrees and fifty percent humidity while the baby sleeps, using the living room sensor during the day, with an algorithm tuned to your specific AC unit's thermal characteristics, your specific climate's humidity profile, and your specific floor plan's hot spots. That's not a thermostat anymore. That's a climate management system.
The cost difference is absurd. A hundred and fifty dollars for a used window unit, thirty dollars in sensors and an IR blaster, and a Raspberry Pi you already own running Home Assistant. Versus a thousand dollars for a smart AC that does less.
The smart AC has a better industrial design and a mobile app. That's what you're paying for. The actual control logic is worse, and you can't change it.
You've got the theory. Here's exactly what to do tonight to make your system better. Step one — start with Generic Thermostat and a hysteresis of one degree Celsius. It's not the final answer, but it won't destroy your compressor while you tune everything else. One degree means your AC runs for fifteen to twenty minutes at a stretch, cycles three or four times an hour, and the temperature swings between twenty-one and twenty-three. That's within the AAP's range for the nursery, and it buys you time to get the PID setup right.
Step two — put a BME280 in the baby's room. They're eight dollars. Flash ESPHome onto an ESP32, connect the sensor, and within ten minutes you've got temperature and humidity reporting to Home Assistant every thirty seconds. Create a dedicated climate entity for that room — don't just add the sensor to your existing thermostat card. Give the nursery its own control loop so you can tune it independently.
Step three — install the PID Climate Controller blueprint from Frenck in HACS. Point it at your nursery sensor and your IR blaster switch. Start with the defaults: Kp ten, Ki zero point five, Kd zero point one. Those values work for most residential window units. If the room overshoots and gets too cold, drop Kp to eight or six. If it oscillates — above, below, above — bump Kd to zero point two. If it never quite reaches the setpoint and hovers a few tenths above, increase Ki to zero point seven or one.
Step four — add a dew point template sensor. The formula is built into Home Assistant's template engine, you don't need to calculate anything. Set a threshold of thirteen degrees dew point and wire it into your PID automation as an override condition. If the dew point crosses thirteen, the AC runs regardless of temperature. That single condition is what prevents the nursery from turning into a steam room on cool, humid nights.
The meta-lesson in all of this is that the dumb AC plus smart sensor combo beats the smart AC. A five-hundred-dollar smart window unit ships with a fixed hysteresis you can't change, no humidity integration, and certainly no multi-room coordination. You're paying for a touchscreen and an app. A two-hundred-dollar dumb unit plus thirty dollars in sensors and Home Assistant gives you PID control, dew-point-triggered dehumidification, and the ability to follow the baby from room to room. The expensive product locks you out of the algorithm. The cheap product, with the right software, hands you the keys.
There's one gotcha that trips up almost everyone the first time. If your window AC has its own built-in thermostat — and most do — the IR blaster and the AC's internal sensor will fight each other. The AC thinks the room is one temperature based on its own sensor, Home Assistant thinks it's another based on the BME280, and the system oscillates between two competing versions of reality. The fix is simple but easy to miss. Point the IR blaster at the AC's receiver, then cover the AC's built-in temperature sensor with a piece of tape. Now the AC only acts on the commands it receives from Home Assistant. It's not elegant, but it works.
That's the kind of detail that doesn't make it into any tutorial.
It never does. But it's the difference between a system that hums and one that's constantly undermining itself. And once you've got that sorted, you've effectively built a climate management system that outperforms hardware costing five times as much — running entirely on YAML and eight-dollar sensors.
There's a bigger question lurking behind all of this, and it's one I've been turning over since the European energy crisis really accelerated heat pump adoption last year. All of the tuning we've just described — hysteresis, PID gains, cycle timing — assumes a compressor that's either fully on or fully off. That's how window units and traditional split systems work. But heat pumps with inverter-driven compressors don't cycle that way. They can run at thirty percent capacity for an hour, then ramp to seventy percent when the load increases, then drop back down. The control problem becomes fundamentally different.
Because the algorithm isn't deciding "on or off" anymore. It's deciding "how much.
And the PID parameters that work for a binary system assume the output is either zero or a hundred. With an inverter compressor that can run anywhere from twenty to a hundred percent, you need to retune everything. The P term becomes more sensitive because small adjustments in compressor speed produce small changes in cooling output. The I term needs to be slower because the system can correct gradually instead of in bursts. And the D term becomes critical because the thermal inertia of a modulating system means overshoot happens in slow motion — you don't notice it until the room has been drifting for twenty minutes.
The DIY thermostat problem is about to get harder, not easier, as heat pumps replace traditional AC units across Europe.
The tools aren't quite there yet. Home Assistant's Generic Thermostat has no concept of variable output. The PID Climate Controller blueprint can be adapted — you can map its output to a percentage rather than a binary switch — but it requires custom template sensors and a fair amount of YAML surgery. What we really need is native support for modulating climate control, with the PID logic built into the integration itself rather than bolted on through blueprints.
Which brings up the rumor that's been circulating in the Home Assistant community — Climate 2.0, supposedly targeted for the August release.
The twenty twenty-six point eight release, yes. The details are still sketchy, but the word is that it'll include native PID support, multi-zone coordination, and humidity-aware control as first-class features rather than template sensor workarounds. If that ships, the DIY thermostat effectively catches up to and surpasses what you get from a thousand-dollar Ecobee system — except your data stays local, your tuning parameters are fully exposed, and you can adapt the logic to whatever hardware you already own.
Which would make the whole "dumb AC plus smart sensors" approach not just cheaper, but better on technical merit.
That's the question I'd love to hear from listeners about. If you're running an inverter heat pump — especially one of the newer units that's shown up in European homes since the twenty twenty-five energy crunch — how are you handling the control problem? Have you found PID gains that work for a modulating compressor? Are you using the Generic Thermostat with a wide hysteresis and accepting the inefficiency, or have you built something custom with Node-RED or AppDaemon that handles variable output?
Because the principles we've laid out — dew point control, multi-room sensor aggregation, following the baby — those all still apply regardless of the compressor type. But the algorithm that ties them together needs to speak a different language when the compressor can whisper instead of shout.
Send us your setups. We want to hear what's working, what broke, and especially what tuning parameters you landed on for inverter units. If we get enough responses, we might do a follow-up that's specifically about modulating control.
Now: Hilbert's daily fun fact.
Hilbert: The earliest known phonograph recording medium wasn't Edison's tinfoil cylinder — it was the phonautograph, invented by Édouard-Léon Scott de Martinville in 1857, which etched sound waves onto soot-blackened paper. These were purely visual recordings with no playback mechanism. In 2008, researchers at Lawrence Berkeley National Laboratory optically scanned one from 1860 and reconstructed the audio — a ten-second snippet of someone singing Au Clair de la Lune, predating Edison's playback demonstration by seventeen years.
The first recording of a human voice sat silent for a hundred and forty-eight years because nobody thought to build a reader for it.
A ten-second song trapped in soot. That's either deeply poetic or a cautionary tale about proprietary formats.
This has been My Weird Prompts. Thanks to our producer Hilbert Flumingtop. If you've built something clever with Home Assistant's climate controls — especially if you're wrestling with an inverter heat pump — email the show at show at my weird prompts dot com. We read every one.
Until next time.

")