Daniel sent us this one — and honestly, I feel it in my bones. He's asking about the gear you need for touching up paint in an apartment as non-destructively as possible. The core tension here is that Israeli tenancy law has this wear-and-tear clause now, thanks to Property Reform, but nobody — not landlords, not tenants, not the courts really — knows where the line is between reasonable use and property damage. Meanwhile, landlords are still withholding deposits over a scuff mark on the wall behind your chair. And if they won't give you the paint colors, which they almost never do, you're left trying to match it yourself. So the question is: what's the actual kit, the actual technique, the actual process for fixing these things without making it worse?

This is one of those topics where the anxiety is the real story. I've seen tenants spiral — and I mean genuinely spiral — over a two-centimeter scuff. They'll try to fix it with whatever white paint they found in the makolet, and suddenly there's a matte patch on an eggshell wall that's ten times more visible than the original mark ever was. The landlord walks in, sees the patch, and now you've given them evidence of unauthorized painting. You've upgraded from a scuff to a dispute.
You've taken a misdemeanor and turned it into a felony.
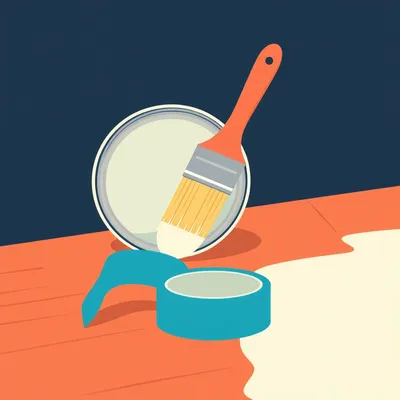
So the first thing to understand is that paint touch-up is a discipline, not a hack. There's a right way, and there's about fifty wrong ways, and most renters pick one of the wrong ways because they're panicking and it's eleven PM the night before the final inspection.
The panic-painting hour. I've been there. It's never ended well.
Let's build the kit from the ground up. And I want to start with the thing nobody thinks about, which is lighting. Before you even touch a wall, you need to see what you're actually dealing with. A scuff that looks invisible under your warm bedroom light at night will look like a crater under the cold fluorescent glare the landlord brings to the inspection. You need a good inspection light.
You're telling me step one is buy a flashlight.
Not just a flashlight. A color-temperature-adjustable work light. Something in the five-thousand to six-thousand-Kelvin range — that's daylight white — because that's what reveals surface texture and color mismatch most brutally. You hold it at a raking angle to the wall, almost parallel, and every bump, every patch, every slight difference in sheen becomes visible. This is how professional painters do punch-list inspections, and it's how you should assess your walls before you do anything.
You're saying inspect like you're the landlord, before the landlord does.
Find the flaws on your terms, in your lighting, when you still have time to fix them properly. Not when the landlord is standing behind you holding the check-out form.
So we've got the light. What's next?
The color match. This is the hardest part, and it's where most people give up or get it wrong. If the landlord won't give you the paint code — and in Israel, they almost never do, because half the time they don't even know it themselves, the painter bought whatever was on sale — you have to do forensic color matching.
I like that. Crime scene investigation for your security deposit.
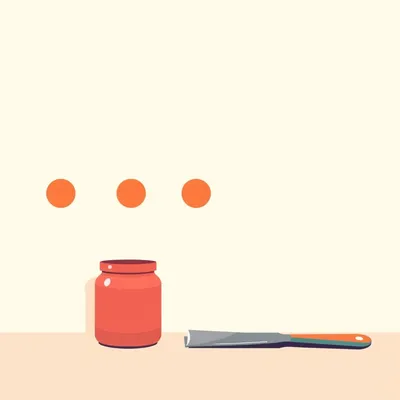
The first tool is the simplest. A utility knife. You find an inconspicuous spot — behind a switch plate, inside a closet, behind the fridge if it's been there since the paint was applied — and you carefully cut out a sample. We're talking maybe a two-centimeter square, down to the plaster. You want the full depth of the paint layers, because what's on top may have faded differently from what's underneath.
This is non-destructive because it's behind a switch plate.
Nobody will ever see it. You take that chip to a paint store — Tambour, Nirlat, any of the major Israeli chains — and they can spectrally analyze it. Most of them have spectrophotometers now. It's a little device that reads the exact color values and spits out a formula. It's not perfect — sheen matching is still tricky — but for color, it'll get you within a tolerance that the human eye can't distinguish.
What if you can't cut out a chip? What if the walls are concrete and the paint is basically fused to it?
Then you go to Plan B, which is the color-matching app. Nirlat has one, Tambour has one, and there are third-party apps like ColorReader and Paint My Place. You hold your phone against the wall, it analyzes the color, and it gives you the closest commercial match. The accuracy is... let's say variable. It depends on your phone's camera sensor, the lighting in the room, whether the wall has any texture. You'll get a match that's in the neighborhood, but you might be a few shades off.
A few shades off is the difference between invisible and "what did you do to my wall.
So the app is a starting point, not the final answer. What you do is get the recommended color in the smallest sample size they sell — usually a hundred milliliters or so — and you test it in an inconspicuous spot. Let it dry completely. Paint always dries darker or lighter than it looks wet. Then check it under your inspection light at a raking angle. If it's wrong, you go back and adjust.
This is beginning to sound like a multi-day operation.
And that's the first thing renters need to internalize. Touch-up is not a one-hour job before the inspection. It's a process that starts weeks before your lease ends. You need time for paint to cure, for colors to be matched and re-matched, for mistakes to be fixed.
Okay, so we've matched the color. Now what about the actual application? Because I've seen people try to dab paint on with a Q-tip or their finger, and it looks...
The applicator matters enormously. And you need different tools depending on the mark. Let me break it down by damage type.
Category one is the scuff — the chair-back-against-the-wall mark, the suitcase dragged past the corner. These are usually surface-level. The paint isn't gouged, it's just had something rubbed against it. For these, you often don't need paint at all. A melamine foam sponge — the generic term for what people call a Magic Eraser — dampened slightly, rubbed gently, will remove most scuffs. The key word is gently. You're not scrubbing. You're lightly buffing. If you scrub, you'll polish the paint and change the sheen, and then you've got a shiny spot that's just as visible as the scuff was.
The Magic Eraser is actually step one, before any paint enters the conversation.
Try to clean it first. Category two is the small chip or nick — the door handle that swung into the wall, the picture-hanging nail hole. For these, you need a tiny applicator. Not a brush — a brush will leave brush marks. You want a micro-applicator, like a disposable eye-shadow sponge or a fine-detail dauber. These are little foam tips on sticks, you can get them at any art supply store or online. You dip just the tip in paint, dab off the excess on a paper towel, and then you literally just touch it to the chip. Let it dry. If it needs more, do another touch. You're building up layers, not globbing paint on.
Building up layers. So it's more like retouching a photograph than painting a wall.
That's exactly the right analogy. You're spot-retouching. Category three is the actual gouge or deep scratch — something that's gone through the paint into the plaster or drywall compound underneath. For these, you need filler first. A tiny tube of ready-mixed spackle or filler — Sano and Tambour both make small tubes in Israel, maybe twenty shekels. You fill the gouge with a putty knife or even a credit card, let it dry, sand it smooth with a very fine grit sanding sponge — we're talking two-hundred-twenty grit or higher — and then prime and paint.
Prime and paint. So now we're at three products just for one gouge.
If you skip the primer, the patch will flash. That's the term — flashing. It's when a painted patch has a different sheen or texture from the surrounding wall, and it catches the light differently. It's instantly visible. Primer seals the filler so it doesn't absorb the paint differently from the surrounding surface. For a tiny patch, you can use the paint itself as a primer if you thin it slightly with water — but I'd rather use actual primer. A tiny bottle of acrylic primer, maybe a hundred milliliters, will last you years.
So we've got the inspection light, the utility knife, the color sample, the Magic Eraser, the micro-applicators, the filler, the primer, and the paint itself. This is becoming a substantial kit. What about sheen?
Sheen is where most touch-ups fail. You can match the color perfectly and still have a visible patch if the sheen is wrong. Paint sheen in Israel typically comes in a few levels: matte or flat, which has no shine at all and is common on ceilings and older apartments, eggshell or satin which has a very subtle luster and is the most common for living room walls, semi-gloss which is used in kitchens and bathrooms, and full gloss which you see on trim and doors.
The landlord's painter probably used whatever was cheapest, so you have no way of knowing.
Here's the trick. Even if you know the sheen level — let's say you're confident it's eggshell — the same paint from the same manufacturer in the same color can look different in a different sheen formulation. And older paint on the wall has been exposed to dust, sunlight, cooking oils, cigarette smoke if it's an older apartment. It's not the same as fresh paint from the can. So you have to match not just the original paint, but the aged paint.
Which is why you take the chip from the wall, not from the can.
And here's another thing about sheen — you can knock down the sheen of a fresh touch-up by very, very lightly buffing it with a piece of brown paper bag after it's fully cured. A brown paper bag. It's just abrasive enough to take the edge off the gloss without scratching the surface. Old painter's trick.
A brown paper bag. You're telling me the final step in a high-tech color-matching process involves a piece of grocery store packaging.
Some of the best techniques are absurdly low-tech. That's what I love about this stuff. The knowledge is passed down, not written down.
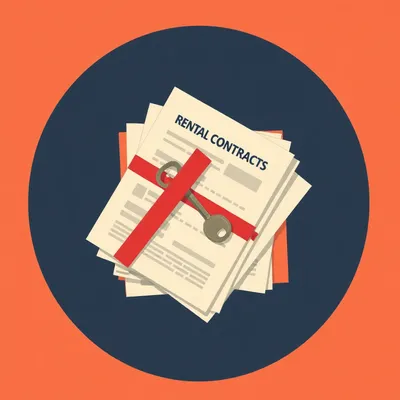
Let's talk about the Israeli-specific dimension here, because the legal framework matters. Property Reform introduced a wear-and-tear clause, but as this prompt points out, nobody knows where the boundaries are.
The Israeli rental market is uniquely brutal on this front. There's no standardized deposit protection scheme like the UK has — no third-party custodian holding the money. The landlord holds the deposit directly, which means they've got your money and you've got to convince them to give it back. The burden of proof is effectively on the tenant. And the wear-and-tear clause, while it exists in theory, is so vaguely worded that it creates more anxiety than it resolves. What's reasonable? A scuff from a chair? A slight darkening around light switches from hand contact? A tiny chip from a door handle? Reasonable people disagree, and the landlord has your money.
The practical answer is: fix everything you can, because arguing about the philosophical boundary between wear and tear and damage is a losing game when the other party is holding your deposit.
Fix everything, document everything, and never assume good faith. That sounds cynical, but I've seen too many cases where tenants did everything right and still got charged for "repainting the entire living room" because of one scuff mark. The documentation is part of the kit, by the way. Before you do any touch-ups, take photos. Take photos of the original damage. Take photos of the repair. Take photos of the finished wall under the inspection light. If the landlord later claims you damaged the wall with your repair, you want a timeline of evidence.
The kit is also a camera. Or your phone, at minimum.
Your phone, with date stamps enabled, in good light. And ideally, take photos when you move in, too. Every wall, every floor, every fixture. Store them in a folder you won't lose. It's the single most important thing you can do to protect your deposit, and almost nobody does it thoroughly.
I want to go back to something you mentioned earlier — the paint store spectrophotometer. How reliable is that, really? Because I've had experiences where the match looked perfect in the store, and then I got home and under my own lights it was...
The spectrophotometer is very good at reading color — it'll give you the exact formula to within a tiny delta-E value, which is the scientific measure of color difference. A delta-E of less than one is imperceptible to the human eye. Most paint store machines can get below one. The problem isn't the color reading. The problem is everything else — the base paint the store uses, the tinting process, the sheen, the age of the wall paint, the texture of the roller that was originally used. All of those introduce variables that the spectrophotometer can't control for.
It's necessary but not sufficient.
It's the best starting point you have. But you always, always test. And here's a tip: when you test, don't just dab paint on the wall. Paint a small square — maybe ten centimeters by ten centimeters — and feather the edges. That means you apply less pressure at the edges so the new paint blends into the old. A hard edge between new paint and old paint is visible even if the colors match perfectly. The feathering is what makes it disappear.
That's a technique, not a product. We're building a skills list alongside the gear list.
The technique is half the kit. You can have the best paint and the best applicators, and if you apply it wrong, it'll look worse than the original damage. The most common mistake I see is people using too much paint. They load up a brush and swipe it on, and now they've got a raised blob of paint that catches the light from every angle. Touch-up paint should be applied in the thinnest possible layers. You're not painting a wall — you're tinting a spot.
Tinting a spot. So we're talking about paint so thin it's almost translucent on the first coat.
And then you build. And between coats, you wait. Impatience is the enemy of good touch-up work.
Let's talk about the specific paint types, because I've walked into a Tambour store and been overwhelmed by the options. Acrylic, polyacrylic, supercryl, easyclean — what am I actually looking for?
For interior walls in Israeli apartments, you're almost always dealing with an acrylic interior wall paint. Tambour's standard interior line is called Supercryl, Nirlat has their own equivalents. These are water-based acrylic paints. They're low-odor, they dry fast, they clean up with water. For touch-up purposes, you want the smallest container available. Most brands sell sample pots — a hundred or two hundred milliliters — which is more than enough for a full apartment's worth of scuffs and chips.
If you're not sure whether the original paint was acrylic or something else? Older apartments might have oil-based paint.
There's a simple test. Dip a cotton ball in rubbing alcohol — isopropyl alcohol, you can get it at any pharmacy — and rub it gently on an inconspicuous spot of the wall. If paint transfers to the cotton, it's water-based acrylic. If nothing comes off, it's oil-based. Oil-based paint requires different products and different techniques, and honestly, if you're dealing with oil-based walls, you might want to just focus on cleaning scuffs and leave actual paint touch-ups to a professional, because the mismatch risks are much higher.
The alcohol test is another tool in the kit. We're now at what — a dozen items?
Let's actually list the full kit. I think that's useful. Start with assessment and documentation: a color-temperature-adjustable work light, your phone camera, and date-stamped photo habits. Then surface prep: melamine foam sponges for scuffs, a utility knife for taking paint chips, rubbing alcohol for the paint type test, fine-grit sanding sponges, and spackle or filler for gouges. Then color matching: your paint chip, the paint store spectrophotometer, a color-matching app as backup, and sample pots of the matched paint. Then application: micro-applicators or eye-shadow sponges, a small angled brush for corners and edges — because some spots are too awkward for a sponge — a mini roller if you're dealing with a larger patch, and primer. Then finishing: a brown paper bag for sheen adjustment, and patience. Lots of patience.
a significant investment for someone who's just trying to get their deposit back.
It's probably a hundred and fifty to two hundred shekels total, if you're starting from scratch. Compared to losing two thousand shekels or more from your deposit, it's a bargain. And most of these items last for years. You'll use them in every apartment you ever rent.
That's a fair point. It's an amortized investment.
Here's something else — in some cases, you might not need to buy all of this. If you have a good relationship with a neighbor who owns their apartment, they might have leftover paint from their own walls. Apartment buildings in Israel often have similar or identical paint colors across units, especially if the building was painted by the same contractor. It's worth asking.
That's good advice. The neighbor's paint can. The social engineering approach to color matching.
The most underrated tool in the kit is just talking to people. The building va'ad, the neighbors, the guy who's been living downstairs for twenty years. Someone knows what paint was used. Someone has a half-empty bucket in their storage unit.
On the flip side, what about the landlord who did give you the paint code? Does that solve everything?
It solves the color. It doesn't solve the aging problem. Even if you have the exact brand, exact color code, exact sheen, your touch-up might still show because the wall paint has faded and the new paint hasn't. In that case, you might need to paint a larger section — corner to corner, or at least a significant area — to make the transition invisible. That's a bigger job, and it starts to cross the line from touch-up to repainting, which you should absolutely get written permission for.
Another thing nobody does.
If you're going to paint an entire wall, even with the matching color, email the landlord first. Get it in writing. "I noticed a few scuffs on the living room wall, I'd like to touch them up with the original paint color you provided. I'm happy to do the work myself if you're okay with that." If they say yes, you've protected yourself. If they say no, you've documented that you tried to address the issue and they prevented you.
That's a chess move. You're creating a paper trail that neutralizes their ability to later claim you damaged the wall and didn't fix it.
And that's the broader philosophy here. The paint kit is one half of deposit protection. The other half is documentation and communication. You want a record that shows you were a responsible tenant who identified issues and attempted to address them in good faith. If it ends up in small claims court — and in Israel, deposit disputes do end up there — that record matters.
Let's talk about some specific Israeli quirks here. I've noticed that a lot of apartments have this textured wall finish — not smooth drywall like in the States, but a kind of stippled or sand-textured surface. How does that affect touch-ups?
Israeli walls are often finished with a spray-applied texture or a roller-applied sand-textured paint. It's called "silk" or "sand" finish in Hebrew — the contractors use a special roller or a hopper gun to apply it. If you try to touch up a textured wall with a smooth applicator, you'll create a smooth patch on a textured surface, and it'll be visible from across the room no matter how well the color matches.
How do you match texture?
It's difficult. For very small spots, you can sometimes stipple the wet paint with a dry sponge to create a bit of texture. For larger areas, you can buy a texture additive — it's basically fine sand or silica that you mix into the paint. Tambour sells it as a texture additive. You mix it in, apply with a short-nap roller, and it dries with a sandy texture. It won't perfectly match the original if the original was spray-applied, but it'll be closer than smooth paint.
This is getting into advanced territory. Texture additives, stippling techniques — we're not just touching up paint anymore, we're doing surface reconstruction.
That's where you have to make a judgment call. Is this scuff bad enough to justify the risk of a bad texture match? Sometimes the answer is no. Sometimes the original scuff is less visible than a bad repair would be. That's a hard thing for anxious tenants to accept — that the best move might be to do nothing.
The Hippocratic oath of apartment touch-ups: first, do no harm.
If you're not confident you can make it better, don't make it worse. Clean the scuff, document it, and be prepared to argue that it falls under normal wear and tear. The Property Reform clause may be vague, but it exists, and a small scuff from a chair is the textbook definition of reasonable use.
What about the timeline? You mentioned earlier that this should start weeks before the lease ends. Can you walk me through what a responsible timeline looks like?
Let's say your lease ends on the first of the month. I'd start the process six weeks out. Week one: do your inspection. Go room by room with your work light at a raking angle. Mark every flaw with a small piece of painter's tape — the blue low-tack kind that won't pull paint off. Week two: collect paint samples. Cut chips from behind switch plates, take them to the paint store, get sample pots. Test the samples in inconspicuous spots. Let them cure for at least forty-eight hours before judging the match.
Forty-eight hours. That's important. People test, wait an hour, and think it looks fine.
Paint changes as it cures. The color shifts, the sheen settles. You need to see the final state, not the wet state. Week three: do your actual touch-ups. Clean scuffs, fill gouges, apply paint in thin layers. Let everything cure fully. Week four: inspect your repairs under the same harsh light you used initially. If something looks off, you've got time to redo it. Week five: final cleaning, final photos, and then you're ready for the landlord walkthrough with documentation in hand.
Six weeks of effort for a rental apartment. That's a lot.
It's a lot, but it's not six weeks of full-time work. It's a few hours spread across six weeks, with lots of drying time in between. The alternative is losing a month's rent worth of deposit because of a scuff mark. The math works out.
I want to circle back to something practical — the actual shopping list. If someone is listening to this and they want to go to the hardware store this afternoon, what are they buying?
I'll give you the list in order of priority. Number one: melamine foam sponges. You can get a pack of ten for maybe fifteen shekels. Number two: a small tube of ready-mixed spackle or filler, Sano or Tambour, about twenty shekels. Number three: a fine-grit sanding sponge, two-hundred-twenty grit or higher, maybe ten shekels. Number four: a set of micro-applicators or makeup sponges — if you go to the cosmetics section instead of the hardware section, you'll find eye-shadow applicators that are perfect for this. Number five: a small angled brush, about one centimeter wide, for corners. Number six: a sample pot of paint matched to your wall, which means you need to bring a chip. Number seven: a small tube of acrylic primer. Number eight: the inspection light. Number nine: the utility knife and painter's tape.
The brown paper bag.
The brown paper bag, which you already have if you've bought groceries recently. That's the whole kit. Under two hundred shekels, fits in a shoebox, and it'll handle ninety-five percent of the scuffs and chips you'll encounter in a rental apartment.
That's useful. I think a lot of people, myself included, have been winging it with whatever was under the sink and hoping for the best. Having an actual kit, an actual process — it changes the psychology. You're not panicking. You're executing a plan.
That psychological shift matters. The landlord can smell panic. If you walk into the final inspection confident because you know you've addressed every issue methodically, you're in a much stronger position. You can say, "I noticed that scuff, here's the repair, here's the photo from before, here's the photo from after." You're not defensive. You're professional.
The professional tenant. It's almost a mindset. You're treating the apartment like a project you're responsible for, not a temporary box you're passing through.
Honestly, that's the right way to rent. Even if the landlord doesn't appreciate it, you'll appreciate it. You're living there. You want the walls to look good. You want to feel good about your space. The deposit protection is almost a side benefit of just maintaining your home properly.
Let's talk about the worst-case scenarios. What if you've done all of this — the kit, the timeline, the documentation — and the landlord still tries to withhold your deposit over paint?
And in Israel, the legal recourse is limited but not nonexistent. Small claims court will hear deposit disputes. The wear-and-tear clause in the Property Reform law gives you a legal basis to argue that normal scuffs and marks are not damage. Your documentation is your evidence. Photos, emails, the timeline of your repairs — all of that goes into a file that you present if it comes to that. Most landlords will back down when they see you've documented everything, because they know they'll lose in court.
The documentation is the deterrent. You're not just preparing to fix the wall — you're preparing to win an argument.
Here's the thing about Israeli landlords. Many of them are not professional property managers. They're individuals who own one or two apartments and treat the deposit like bonus income. They're counting on tenants being too tired, too busy, or too intimidated to fight back. When you show up with a folder of dated photos and a calm, factual explanation of what you did and why, you've changed the power dynamic.
You've out-prepared them. Which, in a system without strong institutional protections, is really the only protection you have.
The system isn't going to protect you. Your own diligence has to do the work. That's the uncomfortable truth of renting in Israel, and it's why a topic like this — a guide to paint touch-up gear — is actually about something much bigger. It's about taking control of a situation that's designed to make you feel powerless.
That's a good place to land, I think. The paint touch-up kit is a tool of empowerment. It's a way of saying: I know the game, I've prepared for it, and I'm not going to be pushed around.
I've seen it work. Tenants who do this right get their deposits back. Tenants who panic and do nothing, or panic and do a bad job, lose money. The difference is preparation.
So to wrap this up for the prompt — the question was about gear for non-destructive paint touch-up in an apartment, specifically in the Israeli context where landlords won't give you the paint colors and the legal protections are thin. We've built the kit, we've laid out the timeline, we've covered the techniques. The core takeaway is: this is a process, not a hack. Start early, match carefully, apply minimally, document everything.
If you only remember three things: melamine sponge for scuffs, paint chip from behind the switch plate for color matching, and the thinnest possible layers when you apply. Those three things will get you most of the way there.
And now: Hilbert's daily fun fact.
Now: Hilbert's daily fun fact.
Hilbert: In the seventeen-twenties, naturalists in the Yukon theorized that cuttlefish achieved their camouflage by physically absorbing and re-emitting the colors of their surroundings through their skin, like a living mirror — a theory that persisted for decades before anyone realized cuttlefish don't live anywhere near the Yukon, and the entire hypothesis was based on a mislabeled specimen jar from a ship's cargo that had traveled from the Mediterranean.
...A mislabeled specimen jar in the Yukon.
The entire field of cuttlefish camouflage studies in North America was founded on a shipping error. honestly, that explains a lot about how science works.
It really does.
This has been My Weird Prompts. Thanks to our producer Hilbert Flumingtop, and thanks to everyone listening. If you want more episodes, you can find us at myweirdprompts.com or wherever you get your podcasts.
If you've got a weird prompt of your own, send it in. We'll see you next time.

")