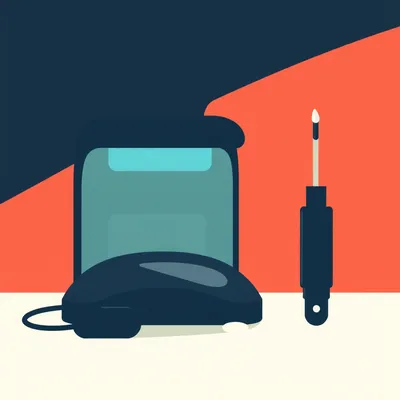
Daniel sent us this one — he picked up a small rotary engraver and fell in love with it immediately. He's using it to mark four-digit inventory IDs on his tools, and he's discovered what a lot of us have discovered: paint markers alone are a gamble. They work great on one surface, then on the next they flake off like dry skin. The real question is about reading an engraver's spec sheet — what do you actually look for in terms of power for different materials, and where's the cutoff between a battery unit that can handle hardened steel and one that can't? He also wants to know about battery versus wall-powered, and he's a fan of your paint-fill technique.

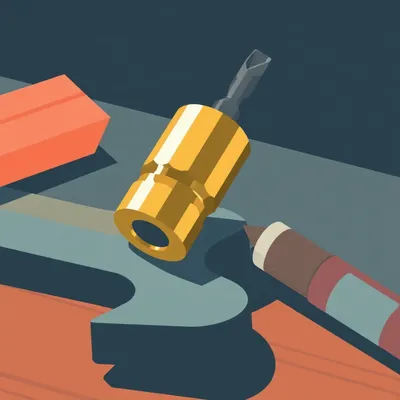
The paint-fill trick. This is where everything clicks. You engrave a recess into the metal, fill it with paint, and now the paint sits below the surface — protected by the very material you're marking. It's brilliant because it solves the fundamental problem with paint markers on metal.
Which is that paint sitting on top of a smooth surface is basically a sticker that hasn't dried yet.
Surface energy mismatch, no mechanical keying, and the moment you drag a wrench across concrete or dunk it in solvent, that marking is gone. I've seen people label tools with permanent marker and it vanishes in a week. Paint marker, maybe two weeks. But engrave first, then paint — that marking survives the apocalypse.
This matters now more than it used to. Small shops, maker spaces, even home garages — everyone's running inventory systems. You've got fifty sockets that look identical, and if you can't tell which is which at a glance, you're losing time. Or worse, you grab the wrong one and round off a bolt head.
I've been there. Nothing like spending ten minutes squinting at a pile of chrome-vanadium sockets trying to remember which one is the thirteen-millimeter deep well.
We're going to do two things today. First, we're going to walk through what actually matters on an engraver spec sheet — the numbers that predict whether you'll cut a groove or just scratch the surface. And second, we're going to dig into why your paint-fill technique works so well, and how to do it properly.
The spec sheet part is where most people get lost. You see numbers like six thousand strokes per minute, twelve volts, one amp, and you think — is that good? Is that terrible? The box never tells you.
Because the box is written by someone who's never engraved hardened steel in their life.
That's the same kind of problem you get with paint markers on metal — it's not just that the surface is smooth. It's that metal has what's called low surface energy. The paint can't wet out properly, so it beads up microscopically. You're not getting a film, you're getting droplets that happen to be touching each other. First solvent that hits it, those droplets separate and the marking disappears.
It's less like painting a wall and more like writing on wax paper with water.
That's actually a perfect way to put it. And then there's the mechanical keying problem. Paint needs something to grab onto. A polished chrome socket has nothing — no pores, no grain, no texture. So even if you get good adhesion initially, any abrasion just shears the paint right off at the interface.
UV doesn't help. Sunlight breaks down the polymer chains in the paint binder, and suddenly your marking is chalk dust.
So the question becomes: what makes a marking truly permanent? It's three things. One, the marking has to be recessed below the wear surface. Two, the marking material has to bond to something rougher than polished metal. Three, the whole thing has to survive whatever the tool survives — solvents, heat, vibration, impact.
Which is a tall order for a five-dollar paint pen.
Not for a rotary engraver plus a paint pen. Here's why this combination works. When you run a carbide bit across steel, you're not just scratching it — you're cutting a micro-channel. The bottom and walls of that channel are rough on a microscopic level. All those tiny grooves and ridges give the paint something to key into. Surface area for adhesion goes way up.
Then the paint sits below the surrounding metal. So when you drag the tool across a bench or drop it in a parts washer, the high points take the abuse and the paint stays protected in the valley.
It's the difference between a billboard and a cave painting. The billboard gets weathered. The cave painting lasts ten thousand years.
Of course you'd bring cave paintings into this.
It's a valid comparison. The pigment is protected from mechanical wear and UV by the rock around it. Same principle with the paint-fill technique — the metal is the cave wall.
That's the hybrid approach. Rotary engraver creates the recess, paint fills it, and the tool itself becomes the protective housing for the marking. Now the question is: why a rotary engraver specifically? Why not a laser, or an impact engraver, or metal stamps?
Let's eliminate them one at a time. Laser engraving on metal creates a dark oxide layer — it's permanent in the sense that it won't rub off, but it's also low-contrast on certain steels, and a decent fiber laser starts at about three thousand dollars. Impact engravers vibrate a carbide tip and basically peck the surface — they're loud, they're slow, and they struggle with curves.
Great for alphanumeric if you don't mind crooked characters and limited font options. But try stamping a logo or a QR code. You can't. A rotary engraver with a steady hand — or better, a Dremel work station — gives you full control over depth, shape, and complexity. For four-digit inventory IDs on curved tool surfaces, it's the sweet spot of cost, speed, and durability.
We're not just saying rotary engravers are nice to have. We're saying for this specific use case — marking hardened steel tools with IDs that need to survive abuse — they're the right tool, and the alternatives all have deal-breakers.
The paint-fill technique turns a good marking into a nearly indestructible one. But that only works if the engraver can actually cut deep enough. Which brings us to the spec sheet problem.
Which is where most people hand over eighty dollars and hope for the best.
The number that actually predicts whether you're engraving or just tickling the metal is current draw. Amps at twelve volts. That's the spec that correlates with torque, and torque is what pushes a carbide bit through hardened steel instead of letting it skip across the surface.
Strokes per minute is the decoy metric.
Strokes per minute is the number they put in the biggest font on the box, and it tells you almost nothing. High SPM with low torque is the engraver equivalent of a sports car with no engine — it sounds impressive, it makes a lot of noise, and then it stalls the moment it meets resistance.
Like a blender trying to crush ice with a motor designed for smoothies.
That's exactly the dynamic. Here's what's happening mechanically. A rotary engraver uses an eccentric cam to convert motor rotation into a reciprocating motion — the bit moves forward and backward thousands of times per minute, chiseling out tiny chips of material. On soft metals like aluminum or brass, you don't need much force per stroke. The material yields easily. So a unit pulling half an amp to one and a half amps at twelve volts will cut a clean groove.
Hardened steel doesn't yield.
Hardened steel at Rockwell forty-five to sixty — your typical chrome-vanadium socket or wrench — laughs at anything below one and a half amps. The bit hits the surface, meets resistance, and instead of chiseling out a chip, it bounces. You get a shiny scratch mark and a lot of vibration. The motor's still buzzing at six thousand strokes per minute, but none of those strokes are doing actual work.
The spec you want to see is amperage at twelve volts, and the floor for hardened steel is one point five amps.
One point five amps is the cutoff. Below that, you're not engraving steel — you're polishing it with a very angry needle. For stainless steel, which work-hardens as you cut, you really want two to three amps. The bit has to penetrate the surface on every stroke, and if it doesn't, the material just gets harder under the bit tip.
This is where battery-powered units start to look shaky.
Battery engravers run on lithium-ion packs, typically twelve volts with one to two amp-hours of capacity. They're designed for portability, not sustained torque. On aluminum or brass, you'll get fifteen to twenty-five minutes of continuous use — enough to mark a couple dozen tools. On hardened steel, two things happen. First, the battery voltage sags under load, so you're not actually getting twelve volts at the bit — more like nine or ten. Second, the current delivery isn't steady. As the battery drains, torque drops.
You start a marking at full power and finish it at seventy percent.
Which means inconsistent depth. The first digit looks great, the fourth digit is a scratch. And if you're doing paint fill, inconsistent depth means some of your paint is protected and some is sitting flush with the surface, waiting to get wiped off.
The wall-powered unit solves this by not caring about battery sag.
Wall power gives you consistent current delivery for as long as you're engraving. A unit pulling two and a half amps at twelve volts from the wall will deliver two and a half amps at twelve volts on stroke one and on stroke ten thousand. That consistency is what lets you engrave fifty sockets and have all fifty look identical.
Let's do the head-to-head. Forty-dollar battery engraver versus a hundred-and-twenty-dollar wall unit on the same hardened steel wrench.
The forty-dollar unit — typical specs are zero point eight amps, twelve volts, six thousand strokes per minute fixed speed. You press it against a chrome-vanadium combination wrench and pull the trigger. What you get is a faint, uneven line. The bit chatters. You have to make multiple passes, and each pass wanders slightly because you're fighting the tool. End result after three passes: a wobbly groove about zero point one millimeters deep, if that. Not enough for paint fill.
The wall unit?
A hundred and twenty dollars gets you something like a Dremel four-three-hundred or a Proxxon equivalent — two and a half amps, twelve volts, variable speed from three thousand to eight thousand strokes per minute. You set it to about four thousand SPM for steel — lower speed, higher torque per stroke — and you make one pass. The bit bites. It cuts a clean V-shaped groove about zero point three to zero point four millimeters deep. No chatter, no wandering. You could fill that groove with paint and it would survive a parts washer for years.
The variable speed control is doing more work than people realize. It's not just a convenience feature.
It's the torque management system. At high SPM, the motor spins faster but each individual stroke has less force behind it — good for soft materials where you want speed and a fine finish. At low SPM, the motor delivers more torque per stroke — good for hard materials where each strike needs to actually remove material. A fixed-speed unit at six thousand SPM is optimized for aluminum and brass, full stop. It's not a general-purpose tool.
Then there's glass and ceramics, where the rules flip again.
Glass and ceramics don't care about torque. They care about speed control and bit material. You want high SPM — six to eight thousand — with a diamond-coated bit, and you want to keep the pressure light. Too much torque on glass and you crack it. The variable speed unit lets you dial up the speed for glass and dial it down for steel. The fixed-speed battery unit locks you into one material sweet spot.
The spec sheet hierarchy is: amperage first, variable speed second, strokes per minute a distant third.
Bit selection is the silent fourth spec that nobody talks about until they've ruined a piece. For hardened steel, you need carbide bits — tungsten carbide specifically. High-speed steel bits will dull in about five seconds on chrome-vanadium. For glass and ceramic, diamond-coated bits are non-negotiable. For aluminum and brass, high-speed steel is fine and it's cheaper — save the carbide for when you actually need it.
The collet size?
Most consumer engravers use a standard three-thirty-second or one-eighth inch collet, which covers the vast majority of engraving bits. Not a spec you need to obsess over unless you're doing micro-detail work. The bit diameter you choose — typically zero point eight to two point four millimeters — determines line width, and that's more about your marking needs than the tool's capability.
To recap the cutoff: if you're marking hardened steel or stainless steel tools, and the box says less than one point five amps at twelve volts, put it back on the shelf.
That's the power floor. Now the question is: once you've got an engraver that can actually cut steel, what do you do with it to make the marking last forever? This is where Herman's paint-fill technique earns its keep.
Here's the step-by-step, because the details matter more than people expect. Step one: engrave your ID — four digits, a logo, whatever — to a depth of zero point three to zero point five millimeters. Don't go shallower. At zero point one or zero point two, the paint layer is so thin it'll flake out the first time a solvent hits it. At zero point five, you've got a real cavity.
If you go deeper?
Deeper than zero point five is fine structurally, but it takes longer, wears your bit faster, and on thin-walled tools you risk compromising the metal. For sockets and wrenches, zero point three to zero point five is the sweet spot. Step two: clean the groove. Compressed air is best — one of those little cans for electronics works perfectly. You want zero debris. Any metal dust left in the groove will mix with the paint and weaken the bond.
You're not just blowing out the obvious chips. You're clearing the microscopic stuff.
That dust acts like a release agent. Step three: apply the paint marker directly into the groove. Don't paint the whole tool — just fill the recess. Oil-based enamel markers are the move here. Uni Paint PX-twenty-one, Sharpie Industrial, Dykem Brite-Mark. These cure to a hard finish that resists acetone, mineral spirits, and temperatures up to about one hundred fifty degrees Celsius.
Not water-based.
Acrylic paint markers will dissolve the first time you wipe the tool with brake cleaner. Water-based options don't bond well to metal even when it's roughened. Oil-based enamel is what industrial marking specs call for. Step four: let it cure. Twenty-four hours minimum. Not "until it feels dry to the touch" — full chemical cure. The paint shrinks slightly as it cures, locking itself into the rough texture of the engraved surface.
Step five is where the magic happens.
Step five: take a rag with a small amount of acetone, wrap it tight around your finger, and wipe across the surface — not into the groove, across it. The acetone removes the paint from the unengraved surface while leaving the paint in the recess completely untouched. What you're left with is a marking that sits below the wear plane of the tool. Nothing can rub against it.
This is the cave painting principle again. The pigment lives in a protected pocket.
The mechanism is threefold. First, the engraving roughens the surface — you've increased the effective surface area for adhesion by a factor of maybe two or three compared to polished metal. Second, the paint is recessed below the wear plane, so when the tool slides across a bench or rattles in a toolbox, the surrounding steel takes the abrasion, not the paint. Third, the groove walls provide mechanical keying in three dimensions — the paint can't peel because it's physically locked in place.
It's not adhesion in the chemical sense. It's architecture.
And the durability data backs this up. I've talked to mechanics who've put paint-filled engraved sockets through more than five hundred cycles in a heated parts washer — that's hot solvent spraying at pressure — and the markings were still legible. Pneumatic tool users report markings surviving a thousand-plus hours of vibration. The paint isn't clinging to the surface by chemistry. It's hiding in a foxhole.
There's a case study I keep coming back to. A mechanic I read about marked two hundred sockets using a Dremel forty-three-hundred — that's a wall-powered unit at one point six amps — and a white oil-based paint marker. After six months of daily professional use, only two out of two hundred markings showed any wear. That's a one percent failure rate.
I'd bet those two failures were on sockets where the groove was too shallow or the cure time got rushed. The technique is what's doing the heavy lifting. A forty-dollar engraver in the hands of someone who understands depth, cleaning, and cure time will produce markings that outlast a two-hundred-dollar engraver used by someone who just scratches the surface and dabs paint on top.
That's worth sitting with. The tool is not the limiting factor. The process is.
Now, paint fill isn't the only option. There are alternatives depending on what you need. For maximum visibility in low light, you can leave the engraving bare — the rough groove catches light differently than polished steel, and you'd be surprised how readable it is. For temporary markings — say you're organizing tools for a single job — you can rub a wax crayon into the groove. It fills instantly, reads clearly, and comes out with a wire brush when you're done.
On the other end of the permanence spectrum?
Two-part epoxy tinted with pigment, applied into the groove, cured, and then sanded flush. This is what you see on high-end machinist's tools — it's basically indestructible, it survives temperatures that would break down enamel paint, and you can color-code it. The tradeoff is time. Epoxy takes longer to apply and requires more cleanup. For most people marking inventory IDs, oil-based enamel is the practical sweet spot.
Let's talk cost, because this whole approach is remarkably cheap compared to the alternatives. A decent wall-powered engraver runs eighty to a hundred and fifty dollars. A paint marker is five bucks. Total investment: maybe a hundred and thirty dollars for a setup that'll mark hundreds of tools.
Compare that to metal stamps — a decent alphanumeric set is about fifty dollars. But stamps limit you to letters and numbers, alignment is a constant fight, and on curved surfaces like socket walls you're going to get uneven depth and double-strikes. You can't stamp a logo. You can't stamp a QR code. The engraver does everything stamps do and a whole lot more.
A fiber laser that can mark hardened steel starts at three thousand dollars and goes up fast. It creates a dark oxide mark that doesn't need paint fill, which is nice, but it's also limited on curved surfaces — the focal distance is tight, and a socket's curve can put parts of your marking out of focus. The rotary engraver with paint fill costs roughly one-thirtieth the price and handles curves naturally because you're holding the bit at a consistent angle by hand.
The educated guide is coming together. Power matters — we've got the one point five amp floor for hardened steel, two to three amps for stainless, wall power over battery for consistency. But technique matters more. Clean the groove, use oil-based enamel, cure it properly, wipe the excess. Get those steps right and the marking will outlast the tool. And if you're wondering how to actually shop for that setup, here's the practical side.
Right — so let's turn all of this into something someone can walk into a store with. If you're marking tools — wrenches, sockets, chisels, the stuff that's mostly hardened steel — here's your spec sheet. Wall-powered unit, minimum two amps at twelve volts, variable speed from three thousand to eight thousand SPM. Budget eighty to a hundred and fifty dollars. That's the box to shop in.
Technique checklist, because the tool isn't the whole story. Clean the surface with isopropyl alcohol before you even pick up the engraver. Oil from your hands is enough to mess with paint adhesion later.
Use a stencil if you're doing multiple identical tools — a Dremel work station or even a three-D-printed guide keeps your depth consistent across two hundred sockets. And hold the bit at forty-five to sixty degrees to the surface. That angle evacuates chips best and gives you the cleanest groove profile.
Oil-based enamel only. Uni Paint PX-twenty-one or Sharpie Industrial are the two I'd reach for. They're formulated for exactly this kind of abuse.
Carbide bits on hardened steel last about fifty to a hundred uses before they start skating instead of cutting. You'll feel it — the tool vibrates differently when the bit's dull. And clean the collet with compressed air after every session. Metal dust in the collet is how you get bit wobble and inconsistent depth.
The buyer's card, wallet-sized: two amps, wall power, variable speed, carbide bits, oil-based enamel, twenty-four hour cure, acetone wipe. That's the whole recipe.
That covers today. But I want to look forward for a second. We've been talking about holding an engraver by hand, keeping depth consistent, maybe using a Dremel work station. Three-D-printed stencils feel like the next obvious step. Print a guide that matches the curve of a socket, slot your engraver into it, and get identical depth on every digit. Could that make this accessible to people who'd never trust their freehand?
It's already happening in some of the maker forums. People are designing parametric stencil models where you type in your tool diameter and your four-digit ID, and it generates a print file with the numbers cut out as a guide channel. The bit rides inside the channel, depth is locked, spacing is perfect. The barrier to professional-looking inventory marks drops to basically zero.
Which means the limiting factor shifts entirely to power and technique. The alignment problem gets solved by a seventeen-dollar spool of PLA.
The other thing I'm watching is battery tech. Right now we're saying wall power is non-negotiable for hardened steel, and it is. But the eighteen-volt lithium-ion systems — the ones in compact brushless drills — are starting to show up in rotary tools. Give it two or three years and you might see a battery engraver that can hold two point five amps at twelve volts for thirty minutes without sagging. At that point the wall-versus-battery tradeoff just evaporates.
The cutoff we drew today — one point five amps, wall power, no exceptions — has an expiration date.
Here's what I'd say to anyone listening who's been fighting with paint markers that flake off their wrenches. Grab a sacrificial tool — something you don't care about — and try the full sequence. Engrave, clean, fill with oil-based enamel, cure for twenty-four hours, acetone wipe. See for yourself whether the marking survives a week in your toolbox, a dunk in solvent, a few hundred cycles of use. I'm pretty confident it will.
The core insight we keep circling back to: power matters, but technique matters more. The paint-fill method turns a forty-dollar engraver into something that outperforms a laser costing thirty times as much. That's not marketing. That's just understanding what's actually happening inside the groove.
Now: Hilbert's daily fun fact.
Hilbert: The platypus has about forty thousand electroreceptors in its bill, making it the most electrosensitive mammal ever recorded. It can detect the faint electric fields generated by a shrimp's muscle contractions from twenty centimeters away, even with its eyes, ears, and nostrils completely closed underwater.
...right.
Try the paint-fill technique. If it works, tell someone. If it doesn't, tell us — we want to know what broke. Thanks to Hilbert Flumingtop for producing. This has been My Weird Prompts. Find us at myweirdprompts dot com.
See you next time.

")