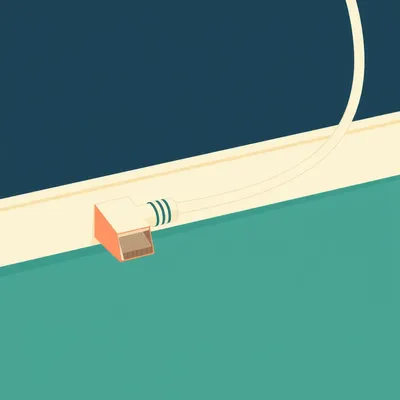
Today we're tackling a problem that's been bugging me for years — and I suspect a lot of you too. Here's what Daniel wrote to us.
I'd like to chat today about a topic that is niche even by our standards. I was a long-term renter for ten years and got into home networking a few years ago. I spent a lot of time putting down Ethernet runs that were non-ideal but dictated rather by what one can do as a renter. Think lots of plastic clip cables and flat Ethernet cables — running under doors if there was a path and hoping for the best. For the most part these have worked fine, but I have to admit they are something of an eyesore.
Let's talk about cable management options for non-permanent networking installations — what one can do to make cable runs less conspicuous while still providing decent runs and clamping for the duration of a tenancy. He's got four specific questions. One: how do you know if a door frame is okay to run a cable under and around? Two: cable braiding and sleeves — different materials and colors for blending into walls. Three: adhesive options that require no touch-up or minimal touch-up to paint upon removal. And four: overall ways to take advantage of wired connections for maximum throughput without making the apartment look like a disordered data center, or having to spend a day before move-out painting and spudging.
So let's break this down — starting with the thing that probably worries people most. Am I going to destroy my door frame?

The short answer is, it depends on the door frame and the cable. Standard interior door frames — the kind found in most apartments built in the last forty years — have a gap on the hinge side between the door and the door stop molding. That gap is typically an eighth of an inch to a quarter of an inch. Three to six millimeters. Flat Ethernet cables are about one point two millimeters thick. Round Cat6 cables are five to six millimeters. Right away you can see the math problem.
So the flat cable slides through with room to spare, and the round cable is basically the same thickness as the gap itself.
If your gap is on the tight end, say three millimeters, and your round cable is five millimeters, you're compressing something. The door stop molding is usually just finish-nailed to the jamb. Over weeks of opening and closing the door, that cable acts like a tiny wedge, pushing the stop molding outward by fractions of a millimeter each time. Eventually the paint seal cracks, the molding works loose, and you've got visible damage.
And Daniel's instinct was right — you can wreck a door frame this way without ever meaning to. What's the test he can do before running anything?
The credit card test. Take a standard credit card — they're about zero point seven six millimeters thick. Slide it through the gap at the hinge side with the door closed. If it passes through with no resistance, a flat cable is absolutely safe. If it's snug, a flat cable will still probably work but you want to check it after a week. If the credit card won't go through at all, do not run any cable through that gap. Period.
And if it fails the credit card test, what then?
That's where alternative routing comes in. And honestly, even if the door frame passes the test, I'd still look at alternatives first. Door frames are pinch points. Every time that door closes, the cable takes a tiny bit of compression. Over months, flat cables can develop internal breaks at the pinch line — not from visible damage, but from repeated micro-flexing. The best door frame is the one you don't use.
So where else do you go?
Baseboards are the obvious first choice. Most baseboards have a small gap between the bottom edge and the floor — it's there to accommodate carpet and floor expansion. You can take a putty knife, gently pry the bottom of the baseboard away from the wall by maybe a sixteenth of an inch, and tuck a flat cable behind it. No adhesive, no clips, completely invisible. When you move out, pull the cable and the baseboard flexes right back. Nobody ever knows.
I've done exactly that in three different apartments. The putty knife is the secret weapon of rental networking.
It really is. And if the baseboard gap isn't workable — some apartments have baseboards caulked to the floor — you can go up. Crown molding, if you have it, has a similar gap at the top. Clear adhesive clips along the top edge of crown molding are nearly invisible from floor level. Or you can run along the corner where the wall meets the ceiling and paint the clips to match.
Let me pause you there, because Daniel specifically asked about door frames, and I want to make sure we cover the damage mechanism properly. What about the door itself? Can you damage the door by running a cable under it?
It depends on the door. Hollow-core interior doors — the kind in most bedrooms — are basically two thin sheets of veneer over a cardboard honeycomb. If you run a cable that's too thick and it creates a pressure point, the bottom rail can bow upward slightly. After a few months the door might not latch properly because the alignment has shifted. Solid-core doors don't have this problem — they're heavy enough that a one-millimeter cable isn't going to deform anything.
So the hollow-core door is actually more vulnerable than the frame in some cases.
In some cases, yeah. And exterior doors are a completely different animal. They have weatherstripping at the bottom — that rubber or brush seal. Running any cable under an exterior door compresses the weatherstripping and creates a gap that lets in drafts, dust, bugs. For exterior doors, you really want to go around, not under. Use a flat cable and run it along the threshold, tucked under the door sweep if there's clearance, or route through the wall if you can access an adjacent outlet box.
Alright, so we've established that door frames are the biggest risk and there are better alternatives. Let's talk about what you actually run the cable along once you've chosen your path — which brings us to braiding, sleeving, and raceways.
This is where the aesthetic part of Daniel's question comes in, and it's the part most people skip. They run a bright blue Cat6 cable along a white baseboard and wonder why it looks terrible. The fix isn't hiding the cable — it's making the cable not worth noticing.
And that starts with the cable itself.
Flat Cat6 cables are already better for this than round ones because they sit flush against the wall and cast less of a shadow. But the real upgrade is sleeving. Techflex PET expandable sleeving — the braided mesh stuff you see in high-end PC builds — comes in over twenty colors. The ones that matter for rental networking are wall white, almond, and gray. Wall white matches most modern US interior paint. Almond matches older off-white and rental-beige. Gray blends with conduit and electrical boxes.
How do you actually use it? You're not going to sleeve a fifty-foot cable by hand.
You absolutely can, and it's not as painful as it sounds. The sleeving expands when you push it together — it gets shorter and fatter. You feed the cable through, then stretch the sleeving back out and it contracts around the cable. For a fifty-foot run, it takes maybe fifteen minutes. Use a piece of masking tape to cap the connector end so it doesn't snag. A hundred-foot roll of quarter-inch Techflex is about twelve dollars.
And if you want something more rigid than a fabric sleeve?
That's where raceways come in. D-Line is the brand that comes up constantly in rental forums. They make paintable PVC raceway channels that use 3M VHB adhesive — Very High Bond — which is a foam acrylic tape. The key thing about VHB is how it fails when you remove it. If you pull it away from the wall at a ninety-degree angle, it can take paint with it. But if you stretch it parallel to the wall surface — the stretch-release technique — the adhesive fails cohesively. It stretches into a long string and releases without pulling on the paint at all.
So the removal angle is everything.
It's everything. Most paint damage from adhesive removal isn't because the adhesive was too strong. It's because someone grabbed the corner of the raceway and yanked it straight outward. You want to pull along the wall, not away from it. And if the adhesive has been up for more than six months, hit it with a hair dryer on low for thirty seconds first. The heat softens the acrylic and makes the stretch-release even cleaner.
Let's talk about the Command clip ecosystem, because that's what Daniel was using — the plastic clip cables, as he called them.
Command brand adhesive clips are the standard recommendation for a reason. They use the same foam acrylic technology, and they're specifically rated for painted drywall. The cord clips come in clear and white, and the clear ones nearly disappear on white walls. For a single flat Cat6 cable, the mini clear clips are all you need. Space them every eighteen inches and the cable stays flat against the wall without sagging.
What about the weight limit? Some of those Command products are rated for like half a pound.
For a single Ethernet cable, weight isn't the issue — it's the peel force. A fifty-foot Cat6 cable weighs less than a pound total. Even the smallest Command clip is rated for a quarter pound, and you're using twenty of them on a fifty-foot run. Each clip is holding maybe a twentieth of a pound. They're not going anywhere.
Daniel also mentioned spudging — scraping adhesive residue before move-out. What's the no-spudge approach?
The no-spudge approach is choosing the right products up front and removing them correctly. Command strips, D-Line VHB, and most 3M foam acrylic adhesives will remove cleanly if you follow the stretch-release method. For anything that does leave residue — and some cheaper raceways use different adhesives that definitely will — you want ninety-one percent isopropyl alcohol on a microfiber cloth. Not seventy percent, not rubbing alcohol. The higher concentration evaporates faster and doesn't soak into the paint. Rub gently in circles, and the residue balls up and comes off. Never use a metal scraper on painted drywall. Plastic razor blades exist for exactly this purpose and cost three dollars for a pack of twenty.
I've seen people use Goo Gone for this too.
Goo Gone works, but it's oil-based. You have to wash the wall with soap and water afterward or the paint will look different in that spot — slightly shinier. Isopropyl alcohol leaves no residue at all. It's the cleaner choice, literally.
Alright, we've covered the hardware — now let's talk about the stuff that actually touches your walls. The adhesive removal science is worth a minute, because I think most people don't understand why some adhesives destroy paint and others don't.
It comes down to the failure mode. Most adhesives fail adhesively — meaning the bond between the adhesive and the surface breaks. When that happens on painted drywall, the adhesive can be stronger than the bond between the paint and the drywall paper. The paint comes off with the adhesive. That's the nightmare scenario.
And the foam acrylic stuff fails differently.
It fails cohesively. The adhesive itself stretches and breaks internally, rather than breaking the bond with the wall. When you pull a Command strip parallel to the wall, you're not fighting the adhesive-to-paint bond. You're stretching the foam until it tears apart. The adhesive stays attached to the strip, not to your wall. That's the entire innovation.
So the physics of it is — pull sideways and the thing destroys itself before it destroys your paint.
And the zero-degree angle is critical. Even a fifteen-degree angle off the wall starts to introduce peel forces. Command actually includes instructions showing this — stretch the tab slowly, keep it against the wall, and pull until the strip releases. It takes about thirty seconds per strip, which is why people get impatient and yank. Don't yank.
What about timeline? Daniel's talking about a tenancy — potentially years. Does the adhesive get stronger over time?
It does. 3M's own documentation says Command strips should ideally be removed within twelve months. After that, the adhesive continues to cure and the bond strengthens. It's not that you can't remove them after two years — you usually can — but the risk of paint damage goes up. If you know you're going to be in a place for multiple years, plan to replace the strips annually. It's a small cost for peace of mind.
Or just use the putty knife and baseboard method, which has no adhesive at all.
The putty knife method is the gold standard for a reason. Zero residue, zero risk, completely invisible. The only downside is that it only works where you have baseboard gaps.
Let's shift to the throughput question, because Daniel's last point was about maximizing data throughput without making the place look like a data center. I think this is where a lot of people go wrong — they run five separate cables from their router to their desk, and suddenly the living room looks like a network operations center.
The solution is a switch. A single five-port unmanaged gigabit switch — something like the TP-Link TL-SG105 — costs about sixteen dollars and solves the whole problem. You put the switch near your router, in a closet or behind a piece of furniture. Run one cable from the router to the switch, then distribute from there. The key is that you only need one visible cable going to your desk area, not five.
And if you need more ports at the desk?
Put a second switch at the desk. Two switches, one cable between them. That single cable carries all the traffic. For a home setup, gigabit is more than enough — even with multiple 4K streams, game streaming, and file transfers, you're not saturating a gigabit link.
What about the cable itself? Daniel mentioned flat Ethernet cables, and I know there's a performance tradeoff there.
There is, and it's worth being honest about. Flat Cat6 cables are more susceptible to crosstalk and signal degradation over long runs. The twisted pairs in round cable cancel out electromagnetic interference. Flat cables can't twist the pairs as effectively because of the form factor. For runs under fifty-five meters — which is basically any apartment — flat Cat6 will perform fine at gigabit speeds. But if you're running PoE, Power over Ethernet, for cameras or access points, use round cable. Flat cables don't dissipate heat as well, and PoE generates heat in the cable.
So the rule of thumb is: flat for data under fifty-five meters, round for anything with power.
That's the safe rule. And for really long runs — if you're in a weirdly shaped apartment and need more than fifty meters — use round Cat6a. It's shielded, it handles higher frequencies, and it'll do ten gigabit if you ever upgrade your equipment.
One thing Daniel didn't ask about but I think is worth mentioning — terminating your own cables. If you're running cable through tight spaces, it's often easier to run unterminated cable and crimp the connectors on afterward.
Pass-through RJ45 connectors make this dramatically easier than it used to be. The wires go all the way through the connector and you trim the excess after crimping. No more guessing whether the wire is seated properly. A decent crimp tool with pass-through connectors is about thirty dollars, and it pays for itself the first time you don't have to redo a termination.
And that lets you drill smaller holes if you're going through... well, you're not drilling holes in a rental. But if you're going through an existing cable pass-through or a gap in the closet wall, the unterminated cable is much easier to fish.
Much easier. The connector is the widest part of the cable. Eliminate it during the run and you can fit through gaps that would otherwise be impossible.
Let's pull all of this together into a practical strategy. Daniel's a renter, he wants wired networking, he doesn't want to repaint when he leaves. What's the tiered approach?
Three tiers, based on run length. For short runs under fifteen feet — that's across a room or through one doorway — flat Cat6 cable with Command clear mini clips along the baseboard. Total cost, maybe twenty dollars. Completely reversible in ten minutes. For medium runs, fifteen to fifty feet — that's going between rooms — round Cat6a in a paintable D-Line raceway along the crown molding or the wall-ceiling corner. Paint the raceway to match the wall before you install it, and it practically vanishes. For long runs over fifty feet, terminate your own cables with pass-through connectors and run through closet walls, ceiling tile gaps if you have a drop ceiling, or along the back edge of built-in shelving.
And the move-out checklist?
Four steps. One: remove all adhesives using the stretch-release technique or heat plus isopropyl. Two: fill any small nail holes with spackling paste — DAP DryDex is the one that goes on pink and dries white, so you know when it's ready to sand. Three: touch up paint using the landlord's original paint if you can get it, or a color-matched sample. Pro tip — on move-in day, take a utility knife and cut a one-inch square of paint from inside a closet. Take that to the paint store for matching. Four: take photos of every cable run on move-in day and again after removal. If there's a deposit dispute, you have timestamped evidence.
The paint chip from the closet is brilliant. Nobody ever looks inside the closet.
And even if they do, it's a one-inch square in the back corner. You spackle it, touch it up with the matched paint, and it's invisible.
I want to circle back to something you mentioned earlier about the credit card test, because I think there's a failure pattern people don't anticipate. Even if the cable fits through the gap on day one, the door can settle. Buildings shift with temperature and humidity. That gap that was a quarter inch in July might be an eighth of an inch in January when the heat is running and the wood dries out.
It's exactly why I said to check after a week. Seasonal movement is real. Interior doors in apartments with steam heat are especially prone to this — the humidity swing between summer and winter can change the gap by a sixteenth of an inch or more. If your cable was borderline in August, it might be compressed in February.
The credit card test isn't a one-and-done. You check it seasonally.
Or you just avoid the door frame entirely, which remains my actual recommendation. Baseboards, crown molding, under rugs, behind furniture — there are almost always alternatives. The door frame is the path of least resistance, which is why everyone defaults to it. But it's also the path with the most long-term risk.
Daniel mentioned running cables under rugs. Is that actually safe?
For flat cables, yes, with caveats. The rug protects the cable from foot traffic, but it also traps heat. Don't run PoE under a rug. And don't run a cable under a rug in a high-traffic path where people are stepping on it constantly — the repeated compression will eventually damage the internal conductors. Under a rug along the edge of the room, where nobody walks, is fine.
What about the door sweep on exterior doors? You said to go around, but is there any scenario where going under an exterior door works?
Only if the door has a brush-style sweep with enough flexibility to conform around the cable, and only with a flat cable. Even then, you're creating a gap for drafts and insects. In a rental, it's almost never worth it. Find another route.
Let's talk about magnetic options, because you mentioned neodymium magnets for metal door frames. I don't think most renters know this is an option.
It's niche but incredibly useful if you have metal door frames. A lot of commercial-to-residential conversions and newer apartment buildings use metal frames. Small neodymium magnets with adhesive-backed cable clips attach directly to the metal — no adhesive on the frame at all. When you move out, you pull the magnet off and there's nothing to clean. A pack of twenty magnet cable clips is about ten dollars online.
For the cable braiding question — Daniel asked about colors specifically. You mentioned wall white, almond, and gray. Is there a way to match more precisely?
The closest you'll get without custom work is Techflex's color range. They have about twenty-four standard colors. Wall white is a warm white that matches most modern rental paint — think Sherwin-Williams Pure White or Benjamin Moore Simply White. Almond is yellower, matches older off-white and rental-beige. If your walls are a specific color, you can paint the sleeving itself — PET takes latex paint reasonably well if you rough it up with fine sandpaper first. But honestly, white sleeving on a white wall is already nearly invisible from six feet away. Most people won't notice it unless they're looking for it.
The raceway approach is even cleaner because you're painting the raceway to match exactly.
The raceway approach is the cleanest non-permanent solution, period. D-Line raceways are designed to be painted. You paint them before installation, let them dry, then stick them up. The seam between the raceway and the wall basically disappears. The only downside is cost — D-Line is about two dollars per foot, so a fifty-foot run is a hundred dollars. But you can take it with you when you move. It's reusable.
Which makes it an investment, not a consumable.
Compared to losing a security deposit, a hundred dollars is nothing.
I want to hit one more thing before we wrap — the single biggest misconception I see about rental networking. People assume that if the door closes, the cable is fine. That's not true. The door closing is the start of the problem, not the end of it.
That's the misconception right there. A door that closes with a cable under it is applying pressure every time it closes. Over hundreds of cycles — and a door in a busy apartment might open and close twenty times a day — that pressure adds up. The paint cracks, the molding shifts, the cable itself degrades. The door closing is not a sign that everything is okay. It's the mechanism of damage.
What's the one purchase that solves most of this? If Daniel's listening and wants to fix his setup this weekend, what does he buy?
A twenty-five dollar kit: fifty feet of flat white Cat6, a pack of twenty Command clear mini cord clips, and a small tube of DAP DryDex spackle. That covers eighty percent of rental networking scenarios. If he wants to go further, add a D-Line raceway for the most visible section of the run and a five-port gigabit switch to consolidate cables. Total investment under sixty dollars, and it all comes with him to the next apartment.
The move-out remediation takes an afternoon instead of a full day of painting and spudging.
Thirty minutes, if you did it right. Remove the clips with the stretch-release technique, wipe any residue with isopropyl alcohol, fill any holes with spackle, touch up with matched paint. Done. Your security deposit is safe.
Here's the open question I keep coming back to. Wi-Fi 7 is here. Mesh systems with dedicated wireless backhaul are getting genuinely good — we're seeing real-world throughput over a gigabit with low latency. In three to five years, are we going to look back at running Ethernet through rental apartments the way we now look at running phone lines?
I don't think so, and here's why. Wireless spectrum is shared. It doesn't matter how good your access point is if your neighbor's router is blasting on the same channel. In dense urban apartments — exactly where most renters live — the interference problem doesn't go away with better Wi-Fi. It gets worse, because everyone upgrades and everyone's signals get stronger. Wired Ethernet is a dedicated medium. No interference, no contention, no retransmits. Until we solve the physics of shared spectrum, there will always be a case for running a cable.
The rental networking problem isn't going anywhere.
It's not. And the solutions we've talked about today — baseboard tucking, paintable raceways, stretch-release adhesives — those are skills that will serve renters for a long time.
We want to hear your rental networking horror stories. The door frame you cracked, the deposit you lost, the clever solution you invented that we didn't think of. Send them to the show.
If this episode saved you from a security deposit dispute, leave us a review. Tell us your landlord's reaction — ideally the one where they said the place looked better than when you moved in.
Thanks to our producer Hilbert Flumingtop for keeping this show running.
This has been My Weird Prompts. Find us at my weird prompts dot com.
We'll be back soon.