Daniel sent us this one — he's asking about the nuts and bolts of server racking, the actual modular building blocks. What do terms like 4U and 6U actually mean, and what should a home user or small business look at for housing something like a UPS and a sixteen-port Ethernet switch? He's also asking about re-casing an existing consumer PC into a rackable form factor — what the common standards are, roughly what a case costs. And then the cabinet question: do you buy shelving and then put it inside a cabinet, or are these sold as integrated units? I think a lot of people hit this exact wall the first time their gear outgrows a shelf in the closet.

It's one of those things where the terminology looks like a wall of gibberish until someone just draws the picture for you, and then it's almost embarrassingly simple. So let's start with the U. The U is the fundamental unit of rack height, and one U is exactly one and three-quarter inches — forty-four point four five millimeters. Everything in the rack world flows from that number. A piece of gear described as 1U is one and three-quarter inches tall. A 2U device is three and a half inches. A 4U device is seven inches. And it goes up from there.
The U is just a vertical building block. It's like Lego bricks for people who find Lego insufficiently heavy and expensive.
And the U defines height only — not width, not depth. The width is a separate standard: the nineteen-inch rack. That nineteen inches refers to the horizontal spacing between the two vertical mounting rails — specifically, the center-to-center distance between the mounting holes on the left and right rails. The actual equipment faceplate is usually about seventeen and three-quarter inches wide to fit between the rails, with mounting ears that extend to meet the nineteen-inch hole pattern.
Nineteen inches wide, and then the height is however many U. So a 4U case is nineteen inches wide and seven inches tall. And the depth is whatever the manufacturer decides.
Depth is the wild west. You'll see network switches that are maybe ten inches deep, and then a full-length server chassis that's thirty inches deep. This is where home users get burned most often. They buy a rack cabinet that's twenty inches deep, and then discover their surplus enterprise server needs twenty-nine inches and the back door won't close.
Well, not me personally — I'm a sloth, I don't lift servers — but I've watched Daniel discover this in real time. The face he made. It was the face of a man realizing he'd bought furniture for a house he doesn't own.
Let's get practical. For someone coming in cold, the first question is: what are you actually trying to rack? A sixteen-port Ethernet switch is almost always 1U and fairly shallow — maybe eight to ten inches deep. A consumer-grade rack-mountable UPS is typically 1U or 2U, and those can be surprisingly deep — sometimes twenty inches or more — because they're packing batteries. A standard desktop PC you want to re-case is usually going to need 3U or 4U, and that's where things get interesting.
Let's talk about the re-casing question, because that's the part of the prompt where I think a lot of people are going to realize they have options they didn't know about. If I have a standard mid-tower PC sitting on my desk and I want to rack it, what do I actually need to know?
First thing to know: the motherboard form factor matters. Most consumer desktops use ATX, microATX, or mini-ITX motherboards. The good news is that rackmount chassis exist for all three. The bad news is that you can't just shove a random case into a rack and call it done — you need a chassis purpose-built for nineteen-inch mounting. The most common standard for rackmount PC cases is the EIA-three-ten nineteen-inch rack standard, and the cases come in heights from 1U up to 5U or 6U for the really serious builds.
What's the sweet spot for a typical home server? I'm assuming 1U is too tight for most consumer hardware.
1U is brutally restrictive. You need low-profile PCIe cards, which often means a riser card that turns the card ninety degrees. You need a low-profile CPU cooler — often a passive heatsink with high-speed forty-millimeter fans that sound like a jet engine spooling up. You're limited on storage. For someone re-casing an existing consumer PC, I'd say 3U or 4U is the practical floor. 3U gives you about five and a quarter inches of internal height, which fits a standard CPU cooler and full-height PCIe cards. 4U gives you seven inches and room for larger fans — which means quieter cooling, which matters a lot if this thing is going to live in your home office rather than a datacenter.
4U is the "I want this to not sound like a hair dryer" option.
It's the "I want my family to still speak to me" option. And there's a thriving market for these cases. Companies like SilverStone, Rosewill, iStarUSA, and Chenbro make rackmount chassis specifically for the home lab and small business market. A decent 4U ATX rackmount case runs anywhere from a hundred dollars to two hundred fifty dollars, depending on build quality, included fans, and whether it has hot-swap drive bays. The Rosewill RSV-L series has been the budget gold standard for years. You can get a Rosewill 4U case for around a hundred to a hundred twenty dollars, and it'll hold a standard ATX motherboard, full-height cards, and a dozen three-and-a-half-inch drives.
A hundred twenty bucks to turn your desktop into rack-mountable infrastructure. That's surprisingly reasonable.
It's one of the best value propositions in home lab building. The case is just a metal box with rails — there's no reason for it to cost a fortune. Now, if you want hot-swap drive bays on the front, the price jumps. A 4U case with twelve hot-swap SAS or SATA bays can run four hundred to six hundred dollars. That's more of a "small business with actual uptime requirements" purchase.
The prompt asks about the rails — do these cases come with rails, or is that a separate purchase?
Most rackmount chassis in the consumer and prosumer market include simple fixed mounting ears — just metal brackets that screw to the front rails. That's fine for lighter cases, up to maybe 4U and twenty pounds or so. But if you're building a storage server with a dozen hard drives, you're looking at forty or fifty pounds fully loaded, and front-mount ears alone are a recipe for sagging and eventual disaster. For those, you want sliding rails — and those are almost always sold separately. A set of quality sliding rails for a 4U chassis runs about forty to eighty dollars. They mount to the side of the case and engage with the rack's vertical rails, letting you slide the whole server out for maintenance without unmounting it.
You're in for the case plus another fifty to eighty bucks if you want proper rails. Still not terrible.
Not terrible at all. And here's a tip that saves people a lot of grief: check the rail compatibility before you buy the case. Some budget rack cases use non-standard mounting points for rails, and you'll end up in adapter purgatory. The reputable brands — SilverStone, iStarUSA — use standard square-hole or round-hole mounting patterns that work with generic rails. The Rosewill cases I mentioned are a bit of a mixed bag here. Their included ears work fine, but finding third-party sliding rails that fit can be a project.
Good to know. Let's shift to the cabinet question, because I think this is where the mental model gets fuzzy for people who haven't done this before. The prompt asks: do you buy metal shelving and then put it inside a cabinet, or are these sold as integrated units?
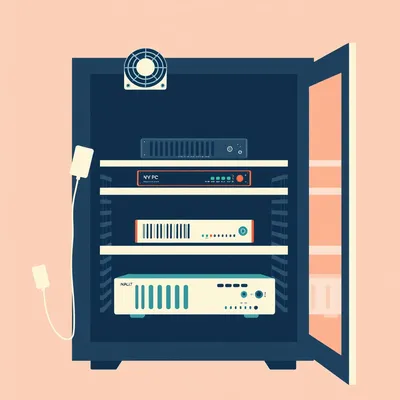
They're almost always sold as integrated units. What you're buying is called a rack cabinet or rack enclosure — it's a single product that includes the frame, the four vertical mounting rails, the side panels, the front door, and usually the back door. You don't buy shelving separately and slide it in. The vertical rails are an integral part of the frame. Now, there are two main flavors: open-frame racks and enclosed cabinets.
Break those down for me.
An open-frame rack is exactly what it sounds like — just the metal frame with the four vertical mounting rails, no sides, no doors. These are cheaper, lighter, and have better airflow because there's nothing enclosing them. They're great for a basement or a dedicated utility room where dust and noise aren't concerns. A basic open-frame rack that's twelve U to twenty-five U tall runs about forty to eighty dollars, sometimes less used. An enclosed cabinet is the same frame but wrapped in metal panels with a locking front door, removable side panels, and usually a rear door. These start around a hundred fifty dollars for a small twelve-U cabinet and can go to five hundred or more for a full forty-two-U enclosed rack with fancy cable management.
For the home user who just wants to mount a switch, a UPS, and maybe one server?
A twelve-U or fifteen-U enclosed cabinet is probably the sweet spot. Twelve U is twenty-one inches of usable vertical space — that fits a 1U switch, a 2U UPS, a 4U server, and you've still got 5U left for a patch panel, a shelf for a modem, whatever else. You can get a perfectly decent twelve-U wall-mount cabinet for around a hundred fifty to two hundred dollars new. The key specs to check are depth and weight capacity. Most small cabinets in this range are about eighteen to twenty inches deep, which is fine for switches and short servers but won't fit a full-depth enterprise server. Weight capacity on a wall-mount twelve-U is usually around a hundred to a hundred fifty pounds — fine for the gear we're talking about, but check before you hang it on drywall.
Hang it on drywall. There's a sentence that's going to end badly for someone.
You absolutely must mount these into studs. A loaded rack cabinet can weigh a hundred pounds, and drywall anchors will fail spectacularly. Lag bolts into wall studs, or better yet, a piece of plywood spanning the studs with the cabinet mounted to that. But let me circle back to something I haven't mentioned yet: the rail hole types. This trips up beginners constantly.
Okay, what are the rail hole types?
The vertical mounting rails come with either round holes, square holes, or threaded holes. Round-hole rails are the old-school standard — you use clip-on cage nuts that grip the round hole and provide a threaded receptacle for your mounting screws. Square-hole rails are the modern standard and also use cage nuts — you snap a cage nut into the square hole and then screw into that. Threaded-hole rails have the threads cut directly into the rail, no cage nuts needed, but they're less common and you're stuck with whatever thread pitch the manufacturer chose — usually ten-thirty-two or twelve-twenty-four. For home use, square-hole rails with cage nuts are the most flexible. You can get cage nuts in whatever thread you need, and if you strip one, you just replace the cage nut instead of the whole rail.
I've heard grown adults use language I won't repeat on this podcast while dealing with cage nuts.
They're fiddly. There's a tool — a cage nut insertion tool — that costs about five dollars and saves your fingertips. It's basically a little metal hook that lets you lever the cage nut into the square hole without pinching yourself. Best five dollars you'll spend in this hobby.
Let's go back to the UPS question, because I think there's a subtlety here that the prompt is getting at. A UPS isn't just "rack it and forget it." There are considerations about weight distribution and battery access.
A rack-mountable UPS is heavy — a 2U fifteen-hundred-VA unit can weigh forty pounds or more, all of it concentrated in a short depth. You want to mount it at the very bottom of the rack for stability. This isn't just a best practice, it's physics — putting forty pounds of lead-acid batteries at the top of a rack makes the whole thing top-heavy and prone to tipping. Most rack cabinets have a recommended loading order, and it's always heaviest at the bottom. UPS first, then servers, then switches and patch panels at the top.
The prompt also asks about a sixteen-port switch specifically. Is there anything special about racking a switch versus other gear?
Switches are the easiest thing to rack. They're almost always 1U, they're shallow, they're light, and the mounting ears are included. The only thing to watch for is port orientation. Some switches have ports on the front, some on the back. If you're putting it in a cabinet with a front door, you want front-facing ports so you can see the link lights and access the cables. Also, think about airflow — most switches pull air from the front or sides and exhaust out the back. In an enclosed cabinet, you want all your gear pulling air in the same direction, front to back, so you're not fighting yourself.
That's the kind of detail that seems obvious once you hear it, but nobody thinks about it on their first build. They just bolt things in and wonder why everything's running hot.
That brings up cooling, which is a whole topic in itself, but for a small setup with a switch, a UPS, and a single 4U server, passive ventilation is usually enough if the cabinet has vented front and rear doors. If you're loading it up with multiple servers, you start needing fan trays at the top of the cabinet to pull hot air out. But for the configuration we're discussing, airflow is manageable.
Let me pull us back to the re-casing question for a minute, because I think there's a scenario we haven't covered. What if someone doesn't want to re-case their existing PC? What if they just want to put the tower on a shelf in the rack?
Totally valid option. You can buy rack-mount shelves — a flat metal shelf that mounts to the front and rear rails. A decent rack shelf runs about twenty to forty dollars. You just set your tower case on it, maybe secure it with some velcro straps, and you're done. It's not elegant, but it works. The downside is that a mid-tower case is typically about seventeen to eighteen inches tall, which is roughly 10U, and you're burning a lot of vertical space for one machine. But if you've got a half-empty rack and don't want to rebuild the PC, it's the path of least resistance.
10U for one desktop tower. That's the vertical equivalent of parking a minivan in a compact spot.
Yet I've seen server rooms where half the racks are exactly that. Sometimes practicality beats aesthetics. But if you're going to do it, get a shelf rated for at least fifty pounds, and ideally one that extends or has some kind of lip at the front so your tower doesn't vibrate its way off the edge over time.
Let's talk about the used market, because I know you have opinions here.
The used enterprise market for rack cabinets is one of the greatest arbitrage opportunities in consumer goods. A full forty-two-U Dell or HP enclosed cabinet that cost two thousand dollars new can be had for two hundred to four hundred dollars on the used market, sometimes less if the seller just wants it gone. The catch is that these are big — forty-two U is over six feet tall — and they're deep, usually thirty-six to forty-two inches. They won't fit through a standard interior door without being partially disassembled, and you'll need a truck to move them. But if you have the space and the means to transport it, the value is absurd.
The "someone just wants it gone" pricing on enterprise racks is its own economic phenomenon. It's like used pianos — the cost is negative, you just have to move it.
I helped a friend pick up a forty-two-U APC NetShelter from a university surplus auction a few years ago. The rack cost him fifty dollars. The rental truck and the pizza for the friends who helped move it cost more than the rack.
For the home user who's just getting started, is the used enterprise rack the move, or are they better off with something smaller and new?
For most home users, a new twelve-U or fifteen-U wall-mount or floor-standing cabinet is the right call. It's sized for the gear they actually have, it'll fit through doorways, and they won't have to explain to their spouse why there's a seven-foot metal monolith in the dining room. The used enterprise racks are for people who know they're going to fill them — homelab enthusiasts running multiple servers, a storage array, networking gear, the whole stack. If you're just racking a switch, a UPS, and one server, the twelve-U cabinet is perfect.
On the re-casing front — any other standards or gotchas people should know about?
First, power supply orientation. In a rackmount case, the power supply is usually at the front or in a specific compartment, not at the top rear like a standard tower. Some rack cases use standard ATX power supplies, some use server-specific form factors like 1U flex ATX or redundant power supplies. If you're re-casing an existing PC, make sure the rack case you buy takes a standard ATX power supply, or budget for a new one. Second, GPU clearance. If your existing PC has a full-length graphics card — and a lot of old PCs getting repurposed as servers have exactly that — you need to make sure the rack case has enough internal depth and the PCIe slots are positioned to accommodate it. A 4U case will fit most consumer GPUs vertically, but check the maximum card length spec. A rack case is a different airflow environment than a tower. You're pulling air front-to-back in a constrained space. Most good 4U cases include two or three hundred-twenty-millimeter fans in the mid-plane or front.
The mid-plane fan wall. That's the thing that separates a "this is a computer in a flat box" from "this is a server chassis designed for rack life.
In a tower case, you've got natural convection helping you — heat rises, vents at the top let it out. In a rack, you're horizontal, and you're sandwiched between other hot boxes. You need forced airflow, and the mid-plane fans create a high-pressure zone that pushes air across the drives and out the back. A 4U case without a proper fan wall is just an oven with mounting ears.
"An oven with mounting ears." I'm writing that down.
Now let's talk about another standard that matters: the rack unit spacing on the vertical rails. The EIA-three-ten standard specifies that the mounting holes are spaced in a repeating pattern of five-eighths, five-eighths, half-inch. That three-hole pattern repeats every one and three-quarter inches — exactly one U. The middle hole in each U is always the half-inch spacing. This is why you'll sometimes see rails with little markings or color-coding to help you count U positions. When you're mounting gear, you want to align the mounting ears with the holes that correspond to whole U boundaries. If you're off by one hole, your gear is sitting between two U positions, and the next piece you try to mount won't line up.
The holes aren't just evenly spaced. There's a rhythm to it.
There's a rhythm. And once you know the rhythm, you can count U positions by feel. The cage nut holes at the top and bottom of each U are closer together than the ones that span the U boundary. It's one of those things that's completely invisible until someone points it out, and then you can't unsee it.
What about rack screws? The prompt asks about standards, and I feel like screws are the part of this where everyone ends up with a drawer full of mismatched fasteners.
The standard rack screw is a ten-thirty-two machine screw, about three-quarters of an inch long, with a Phillips head. That's the workhorse. There's also twelve-twenty-four, which is thicker and used in some telecom racks, and M6, which is the metric equivalent common in European racks. For most home users in North America, ten-thirty-two is what you want. And you'll want them with the little plastic washers — those keep the screw from backing out from vibration and prevent the metal ears from getting scratched up. A bag of fifty ten-thirty-two rack screws with washers costs about eight dollars.
Eight dollars to never have the "I don't have the right screws" problem. That's a good trade.
It's one of the cheapest ways to reduce friction in this hobby. Buy the bag of screws, buy the cage nut tool, and buy a pack of cage nuts — maybe twenty M6 cage nuts for when you encounter European gear. Total investment, maybe twenty-five dollars, and you'll be set for years.
Let's circle back to the cabinet question one more time, because I want to make sure we've drawn the distinction clearly. The prompt asks whether you buy shelving and then put it inside a cabinet. I think the confusion comes from seeing rack shelves for sale and assuming the whole rack is built that way — you buy a cabinet shell and then populate it with shelves.
And to be clear: a rack cabinet comes with the vertical mounting rails already installed. Those rails are the core of the system. You don't add them separately. What you might add are accessories: shelves, cable management arms, blanking panels, fan trays. But the rails that your gear actually bolts to are part of the cabinet frame. When you buy a twelve-U wall-mount cabinet, you're getting a welded or bolted steel frame with four vertical rails, side panels, and doors. You unbox it, mount it to the wall, and start bolting gear in. There's no intermediate step of buying shelving to create the mounting surface.
The shelves you can buy are for sitting non-rackable gear on top of — like a cable modem, or that desktop tower we talked about.
A rack shelf is a flat surface that spans between the front and rear rails. It's for gear that doesn't have its own mounting ears. If you've got a small UPS that's not rack-mountable, it goes on a shelf. If you've got an external hard drive, it goes on a shelf. If you want to put a small plant on top of your rack for some reason, shelf. But the rack infrastructure itself — the thing you bolt your switch and server into — that's the cabinet.
The plant on the rack. The true mark of a home lab that has achieved domestic acceptance.
I've seen it. I've also seen a rack used as a side table in a living room, but that was a very specific set of compromises.
Let's talk about one more standard that's worth mentioning: the difference between two-post and four-post racks. I think a beginner might see a two-post telco rack and think that's what they need.
A two-post rack — sometimes called a relay rack — has just two vertical rails, front-facing. It's designed for lightweight networking gear that mounts from the front only: patch panels, switches, shallow equipment. There are no rear rails. You can't mount a server in a two-post rack without a special center-mount kit, and even then, you're putting a lot of cantilevered stress on the front rails. Two-post racks are for network closets and telco rooms. For anything involving servers or UPS units, you want a four-post rack — rails at all four corners, front and rear. Every enclosed cabinet is four-post by design. Every open-frame rack worth buying for server use is four-post.
If you're looking at a cheap open rack on Craigslist and it only has two posts, keep scrolling.
Keep scrolling, or buy it for a dedicated network-only setup. A two-post rack with a switch, a patch panel, and a shelf for a modem is a perfectly reasonable little network rack. But the moment servers enter the picture, you need four posts.
What about the floor-standing versus wall-mount decision? We touched on it briefly, but I think there's a weight and space calculus here.
Wall-mount cabinets top out around fifteen U to eighteen U for anything you'd reasonably hang on a wall. Above that, they're too heavy when loaded and too deep to be practical. A fifteen-U cabinet is about twenty-seven inches tall — that's a substantial wall-mounted object. Floor-standing cabinets start around twelve U for a small footprint unit and go up to forty-eight U. The small floor-standing cabinets — twelve U to twenty-four U — often come with casters, which is nice if you need to move the thing around. The trade-off is floor space. A floor-standing cabinet needs about twenty-four to thirty-six inches of depth clearance, plus room to open the doors. A wall-mount cabinet projects maybe twenty inches from the wall.
The apartment dweller with a closet setup probably wants wall-mount. The person with a basement or a dedicated utility room can go floor-standing.
That's the heuristic. And one more thing on wall-mount: check the swing-out feature. Some wall-mount cabinets have a hinge that lets the whole cabinet swing away from the wall for rear access. That's incredibly useful if you're mounting it in a tight space where you can't easily get behind it. The hinge adds about fifty to a hundred dollars to the price, but it pays for itself the first time you need to re-cable something without unmounting the entire cabinet.
That's the kind of feature you don't know you need until you're contorted behind a hot switch with a flashlight in your teeth.
Speaking from experience?
I've watched others have that experience. I was napping nearby.
Of course you were. Let's hit the re-casing cost question more precisely, because the prompt asked for approximate numbers. Here's a rough breakdown. Budget 4U ATX case — Rosewill, Norco, some of the generic brands: eighty to a hundred thirty dollars. Mid-range 4U case from SilverStone or iStarUSA: a hundred fifty to two hundred fifty dollars. Premium 4U case with hot-swap backplane and redundant power supply support: four hundred to eight hundred dollars. And then if you need rails, add forty to eighty dollars. If you need a new power supply because your existing ATX unit doesn't fit or you want redundancy, that's another eighty to two hundred dollars depending on wattage and efficiency.
The re-case project, all in, is somewhere between a hundred fifty and a thousand dollars depending on how fancy you get. That middle band — two hundred to three hundred bucks for a decent case and rails — is where most home users are going to land.
That's the sweet spot. And for that money, you get a properly cooled, properly mounted server that slides in and out of a rack and doesn't look like a junkyard refugee. It's one of the most satisfying upgrades in home infrastructure, because it transforms your setup from "pile of computers" to "intentional system.
" I like that. There's a psychological component to racking your gear that I think gets overlooked. When it's all bolted into a frame with cable management, it stops being clutter and starts being infrastructure. You treat it differently.
You maintain it differently too. When cables are managed and labeled and everything is accessible from the front or rear, you actually do the maintenance. You don't put off that drive replacement because it means crawling under a desk and untangling a rat's nest. You slide the server out, swap the drive, slide it back.
Alright, let's hit a few more practical points before we wrap. Blanking panels — what are they and do I need them?
Blanking panels are flat metal or plastic plates that cover empty U spaces in your rack. They serve two purposes. One, they improve airflow by preventing hot air from recirculating from the back of the rack to the front through the empty gaps. Two, they look professional. A pack of ten 1U blanking panels costs about fifteen dollars. For a small home setup, they're nice to have but not critical. If you've got a dozen servers in a datacenter, they're mandatory for cooling efficiency. For a twelve-U cabinet with three things in it, they're mostly cosmetic.
Cosmetic, but fifteen dollars of cosmetic that also helps airflow a bit. Seems like an easy yes.
Next: cable management. Most rack cabinets include some basic cable management — usually a few loops or rings on the rear rails for velcro ties. You can also buy horizontal cable management bars that mount in 1U of space and provide a channel for routing cables neatly. A 1U cable management bar costs about fifteen to twenty-five dollars and makes a huge difference in keeping things tidy. For a small setup, one bar between the switch and the patch panel is usually enough.
Patch panels — when do those enter the picture?
A patch panel is basically a row of Ethernet jacks mounted in a 1U panel. You run cables from your rooms or devices to the back of the patch panel, and then use short patch cables from the front to your switch. It means you're not constantly plugging and unplugging cables directly into the switch ports, which are more fragile and more expensive to replace. For a home setup with a sixteen-port switch, a patch panel isn't strictly necessary, but it's nice to have — especially if you're running cables through walls. A sixteen-port patch panel runs about twenty to thirty dollars.
The full shopping list for a beginner rack setup is: cabinet, a few shelves if you have non-rackable gear, a bag of screws, a cage nut tool, maybe a cable management bar, maybe a patch panel, maybe some blanking panels. And the re-case for the server if you're going that route.
That's the list. And you can phase it in. Buy the cabinet, mount the switch and UPS, get everything running. Add the cable management and blanking panels later. Re-case the server when you're ready. It doesn't all have to happen in one weekend.
One thing we haven't mentioned: power distribution. In a rack, you typically don't just plug everything into a power strip on the floor. There are rack-mount power distribution units — PDUs.
A PDU is a power strip designed to mount in a rack. They come in horizontal 1U versions that mount across the front or rear rails, and vertical "zero U" versions that mount along the side of the rack frame. A basic 1U PDU with eight to ten outlets costs about thirty to fifty dollars. The nice thing about a rack-mount PDU is that it keeps your power cables contained within the rack, and you've got one power cord coming out of the rack to the wall. It's cleaner, and it makes it easier to put the whole setup on a single UPS.
The zero-U vertical PDUs — those are the ones that don't take up any rack space because they mount to the side rails?
They're long strips that bolt to the unused space along the side of the rack frame. Great for larger setups where you don't want to burn a whole U on power outlets. For a twelve-U cabinet, a 1U horizontal PDU is simpler and easier.
To pull this all together for the prompt's core question: the modular building blocks are U-based height, nineteen-inch width, and variable depth. For a home user with a switch, a UPS, and a consumer PC, the practical path is a twelve-U to fifteen-U enclosed cabinet, mount the UPS at the bottom, the switch near the top, re-case the PC into a 4U chassis — or put it on a shelf if you'd rather not rebuild — and then add cable management and power distribution as budget allows.
That's the blueprint. And the all-in cost, assuming a new twelve-U cabinet, a decent 4U case, rails, screws, a PDU, and some basic cable management, is going to land somewhere around four hundred to six hundred dollars. Less if you go used on the cabinet. More if you spring for hot-swap drive bays or a premium case. It's a weekend project that permanently upgrades how you interact with your home infrastructure.
It's one of those things where, once you've done it, you wonder why you didn't do it years ago. The rack is just a metal frame with holes, but it imposes order on chaos in a way that's genuinely satisfying.
It's the difference between a stack of books on the floor and a bookshelf. Same books, completely different relationship to them.
That's the analogy. A rack is a bookshelf for computers. And now I'm going to nap, because thinking about heavy metal objects has exhausted me.
You didn't lift anything.
Now: Hilbert's daily fun fact.
Hilbert: The word "cuttlefish" has nothing to do with cuttling — it comes from the Old English "cudele," which itself traces back to the Old Norse "koddi," meaning cushion or soft object, referring to the cuttlebone's puffy texture. Meanwhile, Renaissance-era Portuguese sailors in the Azores called them "chocos," a name still used in Portuguese cooking today.
Cuttlefish are soft pillows that you can also eat as chocos.
This has been My Weird Prompts. Our producer is Hilbert Flumingtop. You can find every episode at myweirdprompts.com, and if you enjoyed this one, leave us a review — it helps other people find the show. For Herman Poppleberry, I'm Corn. We'll catch you next time.

")