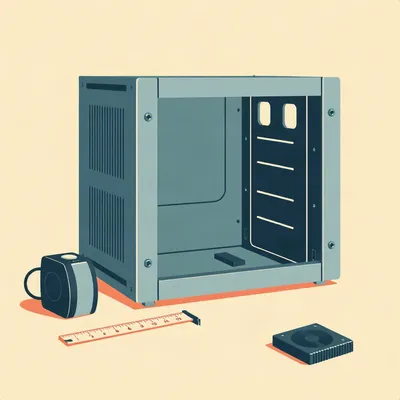
Daniel sent us this prompt after buying a 6U communications cabinet and opening the box to find... an empty metal box with two rails. No shelves, no instructions, just a hollow rectangle and a world of possibilities. He's got a modem, a mini PC, a firewall, a switch, and a NAS — none of them in rack form factor — and he wants to know how to lay it all out efficiently. Where does the power go? How do you size and mount a fan? What's the best way to drill an access hole for cables? How much clearance should you leave behind a shelf? And what hardware do you actually need that doesn't come in the box?

This is the exact moment every home labber hits eventually. You've outgrown the IKEA hack — maybe you built one and it's a mess of cables and heat, or maybe you priced out a LackRack and realized a proper 6U cabinet was actually cheaper. Either way, you're now staring at this empty box wondering what you just signed up for.
To be fair, it's bigger than you think. Daniel mentioned the 55 centimeter width and 30 centimeter depth — in product photos these things look like a shoebox with ambition. In person, it's a substantial piece of furniture. That 30 centimeter depth is the number that dictates everything else you're going to do.
Right, because most rack-mount servers and enterprise gear expect 60 centimeters or more of depth. A 30 centimeter comms cabinet forces you into what I'd call the shelf-sitter strategy. You're not sliding servers onto rails — you're putting shelves in and placing equipment on them like books on a bookshelf. Which is completely fine for home lab gear, but it means your shelf choices and clearance planning become the whole game.
You've got this empty box. Let's talk about what you're actually working with. Why doesn't a comms cabinet come with shelves? Because it's designed for patch panels and rack-mount switches that bolt directly to the rails. Shelves are an accessory, not a default. The manufacturer assumes you're either buying rack-native gear or you know you need to order shelves separately. It's not a defect — it's just a different ecosystem than server racks, which sometimes ship with at least one shelf.
That's the key distinction. A comms cabinet — what Daniel bought — is built for networking equipment. Shallow depth, glass or mesh front door, often wall-mountable. A server rack is deeper, usually enclosed, and designed for compute hardware that generates serious heat and needs serious airflow. The comms cabinet is the right call for a home lab with mini PCs and a NAS, but you have to understand that the depth constraint is real and it shapes every decision downstream.
Daniel also mentioned he already had a PDU that screws in from one side, and he wasn't sure if he needed a DIN rail. So let's start there, because the first decision that affects everything else is where to put the power.
Power distribution goes at the bottom. This is one of those rules where the reasoning is so straightforward that once you hear it, you never forget it. Cables are heavy and gravity pulls them down. Put your PDU at the bottom of the cabinet and both physics and cable management work in your favor. The power cables from all your devices naturally route downward, and the PDU itself isn't sitting in a column of hot air rising from everything below it.
Also, if you've got a UPS — and if you don't yet, put it on the list — the UPS is the heaviest thing in the cabinet by a wide margin. You want that weight as low as possible for stability, especially if the cabinet is wall-mounted. A bottom-heavy cabinet is a happy cabinet.
On the DIN rail question — Daniel asked if it's necessary, and for most home labs the answer is no. The PDU he already has screws directly to the rail from one side, and that's how most home-lab PDUs work. A DIN rail is only needed if you're adding DIN-rail-mount components like Mean Well power supplies, terminal blocks, or industrial circuit breakers. The standard DIN rail is 35 millimeters wide, per DIN EN 60715 — it's called a top-hat rail because of the cross-section shape — and you can bolt a section of it to the rear mounting holes of the cabinet if you ever need it. But for a modem, switch, mini PC, and NAS? You don't need it.
If someone does want to add a DIN rail later, what's the actual mounting process?
You buy a section of 35 millimeter DIN rail — it's sold by the meter and you cut it to length with a hacksaw — and bolt it horizontally to the rear of the cabinet using M4 or M6 bolts into the pre-drilled holes that are already there. Position it about 2 to 3 centimeters from the rear edge so you've got clearance for the components that clip onto it. But again, this is optional. Daniel's setup doesn't call for it, and most home labs won't either unless you're building custom power distribution.
Let's talk about cooling, because that's the thing everyone worries about and almost everyone over-specs.
This is where I get to tell people to calm down, which is rare for me. A 6U cabinet has an internal volume of about 0.16 cubic meters. For a typical home lab load under 300 watts — which is what a modem, switch, mini PC, and NAS will draw combined — a single 120 millimeter fan pushing 80 to 100 cubic feet per minute is more than sufficient. You don't need a jet engine. You don't need dual fans. One fan, mounted as exhaust on the top panel, creates negative pressure that pulls cool air in through any front vents and pushes hot air out the top.
Daniel asked specifically how to affix a fan to the case itself, and this is where people who've never worked with sheet metal get nervous.
Most cabinet tops have a dimpled pattern or a pre-cut area designed for fan mounting. You line up your fan, mark the screw holes, drill pilot holes with a small bit, and then use self-tapping sheet metal screws — number 8 or M4 size — to secure the fan. If you want to reduce vibration noise, use rubber grommet fan mounts instead of hard screws. They push through the fan holes and then into the cabinet, and they decouple the fan from the metal so you don't get that low-frequency hum transmitted through the whole enclosure.
Fan grill on the inside or outside?
The fan itself mounts to the inside of the top panel, blowing upward. The grill goes on the inside face of the fan to protect your fingers when you're reaching into the cabinet. If you're mounting an intake fan at the bottom instead — which some people do for positive pressure setups — put a dust filter on the outside. But for most home labs, top exhaust is the way to go. Heat rises, help it along.
Daniel asked about the best way to drill an access hole for power cables, and this is one of those things where the right tool makes the difference between a clean job and a mangled mess.
Also called a unibit. If you take one thing from this episode, let it be this: a step bit produces clean, round holes in sheet metal without grabbing, warping, or tearing. A standard twist drill bit will catch on the thin metal and either spin the workpiece or deform the hole into something that looks like a shark bite. A step bit widens the hole gradually in increments, and each step acts as a deburring edge. Start with a quarter-inch pilot hole using a regular drill bit, then switch to the step bit and work up to your target size. For a power cable, a 1-inch hole is typical.
Then you don't just leave a raw hole with a cable rubbing against sharp metal.
You use a nylon cable gland — PG11 or PG13.5 size, depending on your cable diameter — that threads into the hole and provides a smooth, sealed pass-through. It protects the cable jacket from abrasion, keeps dust out, and maintains the cabinet's structural integrity. A cable gland costs maybe two dollars and it's the difference between a professional install and something that'll eventually short out.
That's power and cooling sorted. Once those are in place, the real puzzle is fitting non-rack gear onto rack shelves. Daniel bought a 20 centimeter shelf for his 30 centimeter deep cabinet, which is smart — let's talk about why.
The standard recommendation for rear clearance behind a shelf is 75 to 100 millimeters, or about 3 to 4 inches. A 20 centimeter shelf in a 30 centimeter cabinet gives you 10 centimeters of clearance, which is at the upper end of that range — and that's perfect. You want that space for two reasons. First, cable management. Ethernet cables need room to make a 90-degree bend without crimping the jacket or stressing the connector. Hot air needs somewhere to go, and a shelf jammed right against the back panel creates a dead zone.
What's the minimum you'd go?
Don't go below 5 centimeters. Below that, you're forcing cables into tight bends and you're choking off any rear ventilation your devices might have. Some switches and NAS units vent out the back, and if you've got them pressed against a metal panel with no gap, you're building an oven.
Daniel's 20 centimeter shelf in a 30 centimeter cabinet is actually ideal. That 10 centimeter rear gap lets him route cables cleanly, bend them without damage, and keep air moving.
Here's a concrete example. Say he's mounting a 4 centimeter deep mini PC and a 12 centimeter deep switch on that shelf. The switch sits forward, the mini PC sits behind it or beside it, and there's still 10 centimeters of clear space at the rear. An Ethernet cable with a standard boot needs about 4 to 5 centimeters of bend radius to avoid kinking. With 10 centimeters, you've got room for a gentle curve and a service loop. It's the kind of thing that feels like over-planning until you're on your hands and knees behind the cabinet trying to trace a cable that's been crimped into a right angle for six months.
Let's talk about mounting non-rack hardware onto shelves, because none of Daniel's gear has rack ears.
Universal rack shelves are the answer. They come in 1U or 2U heights and they're basically vented metal trays that bolt to the front and rear rails. You place your devices on the shelf and secure them with Velcro straps or adhesive rubber feet. Do not drill through the device chassis to mount it — unless the device has mounting holes designed for it, you're just putting holes in something that wasn't meant to have holes.
For mini PCs specifically?
A 1U vented shelf is perfect. Mini PCs are light, they generate modest heat, and the vented surface lets air circulate underneath. Use Velcro straps looped through the shelf vents to hold the mini PC in place. It's secure, it's removable, and it doesn't void any warranties.
Let's talk about the layout. Daniel's got a modem, mini PC running firewall, switch, NAS, and a PDU. How do you arrange that in 6U of vertical space?
Bottom shelf, U1 and U2 — that's your NAS. It's the heaviest thing after a UPS, and it's vibration-sensitive. Hard drives don't love being jostled, and putting the NAS low keeps the cabinet's center of gravity down. If you have a UPS, it goes on the shelf above the NAS, so U3. Third shelf, U4 — that's your mini PC running the firewall. It's light and generates moderate heat, so it sits in the middle where airflow is good. Top shelf, U5 — modem and switch. These are the lightest and often the hottest-running devices in a home lab, especially switches without active cooling. Heat rises, so put them at the top where the exhaust fan pulls air past them and out.
Mounted vertically on the left or right rail, at the bottom. Screw it in from one side — that's how most home-lab PDUs are designed to mount. The power cables from all your devices route down the side rail to the PDU, and because it's at the bottom, you're not draping cables across equipment. Clean, simple, and when you need to trace a power cable, you know exactly where it goes.
You've got strong opinions here.
Velcro cable ties. Not zip ties. This is the hill I will die on. Zip ties are permanent — you have to cut them off to make a change, and one slip with the scissors nicks a cable jacket. Velcro ties are reusable, adjustable, and gentle on cables. You will reconfigure your home lab. Velcro means you can do it in five minutes instead of an hour of cutting and re-tying.
The service loop thing?
Leave about 15 to 20 centimeters of slack per cable — that's your service loop. Bundle the excess neatly along the side rail with Velcro ties. The point is that you can pull a device out of the cabinet without unplugging everything. If your cables are taut from device to PDU, you can't slide a shelf out without disconnecting power. A service loop gives you enough slack to pull the shelf forward, inspect the device, swap a cable, whatever you need to do.
Horizontal cable managers between shelves?
1U brush panels at the front between shelves are great if you've got the space. They're strips with bristles that cables pass through, and they keep everything looking clean from the front. But in a 6U cabinet with four shelves, you might not have the spare U for brush panels. If that's the case, just route cables along the side rails and use Velcro tie points. It's not as pretty from the front, but it's functional and it doesn't eat a whole U of vertical space.
Let's talk about the hardware checklist, because this is where first-timers get burned. You open the box, you've got rails, and you realize you need a bunch of small parts that didn't come with the cabinet.
First, check what your rails accept. Most 19-inch rack rails use M6 cage nuts. A cage nut is a square nut that clips into a square hole in the rail, and it provides a threaded receptacle for your screws. Some cabinets come with cage nuts and screws included. Many comms cabinets do not. You need to know this before you start mounting shelves.
If your rails have threaded holes instead of square holes?
Then you don't need cage nuts at all — the holes are already threaded, usually for M6 or 10-32 screws. Check the thread pitch before you buy anything. But the square-hole-with-cage-nut system is more common, and it's what you should plan for unless you know otherwise.
Here's the shopping list. M6 cage nuts — buy a bag of 20, you'll use more than you think. M6 screws, 12 millimeter length — this is the standard for rack mounting. Flat washers to go between the screw head and the equipment ear or shelf bracket. Velcro cable ties — a roll of the stuff, not a pack of six. And a cage nut tool.
The cage nut tool. This is the thing Daniel didn't know he needed.
It's the best five dollars a home lab builder can spend. A cage nut tool is a little metal hook that lets you snap a cage nut into a square hole without destroying your fingertips. Without it, you're using a flathead screwdriver, which slips, scratches the rail, and occasionally draws blood. With it, you hook the cage nut, pull it through the hole, and it clicks into place in one second. It's one of those tools where the first time you use it, you wonder why you ever did it the hard way.
If someone's adding a DIN rail to the rear?
Then you also need M4 or M6 bolts — whichever matches your cabinet's rear mounting holes — plus corresponding nuts or the existing threaded holes. The DIN rail itself you buy by length and cut with a hacksaw. Deburr the cut edge with a file so you don't slice your hand open reaching into the back of the cabinet. DIN rail components clip on with a spring-loaded mechanism — no additional hardware needed for the components themselves.
Let's boil all that down into a checklist you can use this weekend. Number one: measure your cabinet depth and buy shelves with at least 5 centimeters of rear clearance. Daniel's 20 centimeter shelf in a 30 centimeter cabinet is the sweet spot. Number two: PDU at the bottom, fan at the top. Physics is doing the work here, let it. Number three: use a step bit for any drilling. A unibit costs maybe 15 dollars and it'll save you from mangling your cabinet. Number four: buy M6 cage nuts and 12 millimeter screws — they're not always included, and finding out at 10 PM on a Saturday is a special kind of frustration. Number five: Velcro, not zip ties. Future you will thank present you.
If I had to compress the entire layout philosophy into one sentence: heavy and power at the bottom, hot and light at the top, cables managed on the sides. That's it. That's the whole thing. A NAS on the bottom shelf, modem and switch on the top shelf, everything else in between, and all the cables routed down the side rails to the PDU.
The other thing worth saying is: don't overthink it. A 6U cabinet for home gear doesn't need enterprise-level cooling or cable management. A single 120 millimeter fan, one PDU, and two shelves will handle 90 percent of home lab setups. You're not running a data center. You're housing a modem, a switch, and a few small computers. The thermal load is modest, the cable count is manageable, and the whole thing will run quietly and reliably if you just follow the basic layout principles.
The nice thing about doing it right the first time is that the cabinet becomes a platform, not a project. You add a new device, you slot in another shelf. You upgrade the switch, you unplug the old one, Velcro the new one in place, done. The infrastructure — power, cooling, cable routing — is already there. That's the real value of a proper cabinet over an IKEA hack. It's not just tidier, it's extensible.
Here's what I want to know from listeners. What's the weirdest non-rack device you've shoehorned into a cabinet? Someone out there has zip-tied a games console to a shelf or mounted a Raspberry Pi cluster in a way that defies explanation. Send us an email or a voicemail — show at my weird prompts dot com — and we might do a listener builds episode.
Looking forward, this whole category is going to get more interesting. Mini PCs are getting more powerful and more compact every generation. The line between rack-native and shelf-sitter is blurring. I'd expect to see more 1U form-factor home gear in the next two or three years — switches with built-in firewalls, NAS units designed for shallow cabinets, power supplies that clip onto DIN rails by default. The ecosystem is catching up to the home lab demand.
If you found this useful, leave a review wherever you listen. It helps other home labbers find the show when they're standing in front of an empty cabinet wondering what to do next.
And now: Hilbert's daily fun fact.

In the 1950s, a Soviet botanist's field notebook from Tajikistan's Pamir Mountains described a population of Drosera sundews that appeared to trap insects primarily with their roots rather than their leaf tentacles — a claim that was dismissed as observational error and never formally published.
...right.
This has been My Weird Prompts. I'm Corn.
I'm Herman Poppleberry. We'll catch you next time.