Daniel's moving into a new apartment, and he's been photographing every corner of it trying to figure out whether his furniture will actually fit. He's tried ImageMeter for annotating photos with dimensions, he's tried Android AR ruler apps, and both have let him down. The AR measurements drift, they depend heavily on the camera and ARCore, and ordinary photos have no reliable scale unless you include a known reference object. So he started looking into fiducial markers — AprilTags, ArUco, ChArUco boards, checkerboards — the kind of thing robotics and machine vision use all the time, but that somehow never made it into consumer measurement apps. His question, and I'm going to read this nearly in full because the specifics matter here — what are these different reference marker systems, how do they actually work, and how do you compare them? Strengths, weaknesses, the whole taxonomy. But the real question is practical: which one would actually help you take a normal smartphone photo and establish an accurate spatial scale from it? And then — this is the part I like — he wants to know what a marker can genuinely tell you versus what it can't, especially when objects are at different depths or on different planes. And finally, what would the ideal physical reference board look like? Size, material, what's printed on it, where you put it in the scene. Should it combine a fiducial marker with ordinary metric rulers?
There's a lot here, and the depth question is the right one to lead with. He's already run into the wall that most people hit — the phone says one thing, the tape measure says another, and you're standing there wondering which one to trust.
The tape measure. Always the tape measure.
Well, yes. But the tape measure is annoying, which is why we're having this conversation. So let's start with what a fiducial marker actually is, because the name sounds like a medical device but the concept is dead simple. A fiducial marker is just a visual landmark with known geometry — you print a specific pattern at a specific size, the camera sees it, and software says "I know exactly how big that thing is in the real world, so now I can figure out how big everything else on that same surface must be."
It's a known quantity you deliberately place in an unknown scene.
And the reason a normal photo can't give you scale is that a photo is just a grid of pixels. The camera has no idea whether that bookshelf is two feet wide and close up, or six feet wide and far away. It's the same number of pixels either way. You need something in the image whose real-world size is known, and then you can work backwards from there.
Which is why people put coins next to fossils in museum photos.
That's the exact same principle. A quarter is about twenty-four millimeters in diameter — now every paleontologist looking at that photo has a reference. But a coin is round, it's small, it's not designed for computer vision to detect automatically. Fiducial markers are designed for exactly that.
So let's pull apart the alphabet soup. What's an AprilTag?
AprilTags were developed at the University of Michigan for robotics applications. They're black and white square patterns — they look a bit like a QR code's minimalist cousin — and each one encodes a unique ID number in a binary pattern. The software finds the four corners of the square, reads the internal pattern to figure out which tag it is, and then because you've told it "this tag is ten centimeters across in the real world," it can compute the camera's position and orientation relative to that tag. That's what's called pose estimation — position and orientation, six degrees of freedom.
And the name? April?
It's actually an acronym. April Robotics Laboratory at Michigan. I don't remember what the letters stand for and I'm not sure anyone does anymore. But the key thing about AprilTags is they were designed for robustness — they need to be detectable under wildly varying lighting, at steep angles, partially obscured. A warehouse robot rolling past a shelf at speed needs to see that tag and know instantly where it is.
So if I print an AprilTag and stick it on my wall, my phone can tell me exactly how far away it is and at what angle I'm holding the camera.
Yes. And from that, it can tell you that anything else on that same wall — on the same plane — is scaled correctly. That last part is the catch, and we'll come back to it.
And ArUco markers — that's a different thing?
Similar concept, different ecosystem. ArUco markers are part of OpenCV, the massive open-source computer vision library. They're also square, also encode a binary ID, but the encoding scheme and error correction properties are different. The practical difference for someone like Daniel is that ArUco is everywhere. OpenCV is free, it's installed on millions of machines, and there are dozens of apps that can detect ArUco markers because the code is just sitting there ready to use. AprilTags require a separate library. Not a huge barrier, but it's an extra step.
So ArUco is the more accessible one for a consumer who just wants to measure their apartment.
For consumer use, ArUco is probably the path of least resistance. The detection is fast, it's well-documented, and you can generate markers from a web page in thirty seconds. The trade-off is that AprilTags have slightly better detection at extreme angles and in weird lighting — they were tuned for that robotics use case. But for someone standing in a well-lit room taking a photo of their floor, either one will work fine.
And then there's ChArUco, which sounds like a Pokémon.
ChArUco is the hybrid. It's a checkerboard pattern with ArUco markers embedded in the white squares. The checkerboard gives you dense corner points — every intersection of black and white is a detectable point with sub-pixel precision. The ArUco markers give you unique IDs so the software knows which corner is which, even if part of the board is covered or out of frame. This is the gold standard for camera calibration because you get both the precision of the checkerboard and the robustness of the markers.
And a plain checkerboard — just alternating squares, no IDs — that's the classic calibration target you see in every computer vision lab.
Right. Checkerboards are purely about corner detection. The corners are extremely precise — you can locate them to within a fraction of a pixel — but there's no ID system. The software has to see the whole board and count squares to figure out which corner is which. If you cover part of it, or if it goes off the edge of the frame, the detection fails. ChArUco solves that problem by putting a unique ArUco marker in each white square, so even a partial view works.
So for calibration — fixing lens distortion — ChArUco is the best thing going. But Daniel isn't trying to calibrate his camera. He's trying to measure a sofa.
And that's where we need to talk about what these markers actually give you, because this is the part that trips people up. A marker establishes scale on its own plane and only on its own plane. If you put an ArUco marker on the floor and you're measuring something that's also on the floor — the base of a bookshelf, the footprint of a desk — the scale is accurate. But if that bookshelf is six feet tall and you're trying to measure its height from the same photo, the top of the bookshelf is at a different depth from the camera than the marker on the floor. The scale doesn't transfer.
So the marker tells you "one pixel equals three millimeters" but only for things that are the same distance from the camera as the marker itself.
The software detects the four corners of the marker in the image. It knows those four corners form a square of, say, ten centimeters in the real world. From those four correspondences — four points in 3D, four points in 2D — it can solve for the camera's pose: where the camera is and how it's oriented relative to the marker. Once you know the pose, you can say "any point on the same plane as the marker can be measured accurately." But a point that's two feet behind the marker? The geometry is different, and the measurement will be wrong.
How wrong?
It depends on the depth difference and the camera angle. If the object is twice as far from the camera as the marker, it'll appear half the size on the sensor, and a naive measurement will be off by a factor of two. That's not a small error — that's "I bought a bookshelf that doesn't fit" territory.
Which is exactly the problem Daniel's trying to avoid.
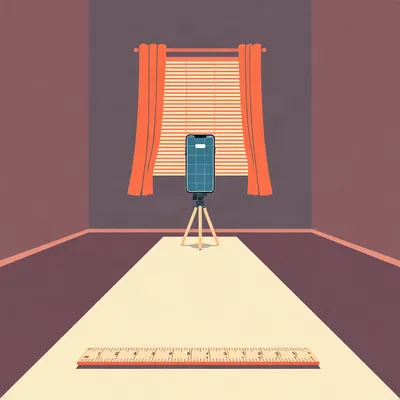
Right. So the practical rule is: put the marker on the same plane as whatever you're measuring. Measuring a sofa's footprint? Marker goes on the floor next to it. Measuring whether a painting will fit on a wall? Marker goes on the wall, at the same height. Measuring the depth of a shelf? Marker goes on that shelf.
And if you need to measure things on multiple planes, you either need multiple markers or you move the marker and take another photo.
Or you use something that can estimate depth separately — like a stereo camera or a LiDAR sensor — but now we're way outside "normal smartphone photo" territory. Some high-end phones have LiDAR, but Daniel mentioned Android and ARCore, so I'm guessing that's not his setup.
Let's talk about lens calibration, because that's another thing these markers can do that people conflate with measurement. What's actually happening with distortion?
Phone lenses have barrel distortion — straight lines near the edges of the frame curve outward slightly. It's usually not something you notice in everyday photos, but if you're trying to measure something near the edge of the frame, that distortion can introduce errors of one to two percent. For a two-meter measurement, that's two to four centimeters — enough to matter when you're fitting furniture into a tight space.
And a checkerboard or ChArUco board corrects for that.
Yes, but you need multiple photos from different angles to calibrate the lens properly. A single photo with a marker doesn't calibrate anything — it just gives you scale on one plane. Lens calibration is a separate process where you take ten or twenty photos of the board from different positions and angles, and the software solves for the distortion parameters. It's worth doing once for your phone if you're going to be doing a lot of measurements, but it's not something you do every time you take a measurement photo.
So for Daniel's use case — walking around an apartment, taking photos, annotating dimensions — lens calibration is probably overkill.
For most furniture-fitting decisions, yeah. If you're off by a centimeter because of lens distortion at the edge of the frame, that's almost certainly within your margin for "will this fit." The bigger error source is the plane problem we already talked about. Fix that first.
Let's talk about the simplest possible option. Daniel mentioned a printed ruler or a known-size square. Where does that fall on the spectrum?
It's the baseline. You print a ruler, you put it in the photo, and you manually count pixels. No automatic detection, no pose estimation — you're literally just using it as a visual scale bar. It works, but it's tedious, and it has all the same plane limitations as the fancy markers. Plus, if the ruler isn't perfectly flat or perfectly aligned with the object you're measuring, you get parallax errors.
And the known-size square — like printing a ten-centimeter square and using that as a reference?
Same idea, slightly better because you've got two dimensions to work with. But you're still doing manual pixel counting in ImageMeter or whatever tool you're using. The fiducial markers automate the detection step, which is their real advantage — the software finds the marker, reads its ID, looks up its known size, and computes the scale without you having to click on corners.
So let's design the ideal reference board. Daniel asked for specifics — size, material, what's printed on it, where you put it.
Here's what I'd build. Start with a rigid board — foam core is perfect, it's cheap, it's flat, it won't warp. Maybe A4 size, so roughly twenty-one by thirty centimeters. You want it big enough to fill at least ten to fifteen percent of the image frame at the distance you're shooting from. If it's too small, the corner detection gets noisy and your scale accuracy drops.
And the viewing angle?
Keep it below about forty-five degrees from perpendicular. The steeper the angle, the more the marker appears foreshortened, and the harder it is for the detection algorithm to get a clean read on the corners. Straight-on is ideal, but anything under thirty degrees is fine.
What's printed on this board?
I'd print a ChArUco pattern in the center — say, a five-by-seven grid of squares with ArUco markers embedded in the white ones. That gives you automatic detection and robust pose estimation even if part of the board is covered. Then, along all four edges, print metric rulers — centimeters and millimeters — running the full length and width. The rulers give you a manual cross-check. If the software says the board is twenty-one centimeters wide and you can see on the ruler that it's twenty-one centimeters wide, you know the detection worked correctly. If the numbers disagree, something's wrong — maybe the board is bent, maybe the lighting is causing glare, maybe you printed at the wrong scale.
The rulers are the sanity check.
And they're also useful if you want to measure something manually in the photo without relying on the automatic detection. You've got a physical scale bar built right into the board.
What about the back? Do you print anything on the reverse side?
If you're feeling ambitious, print a different pattern on the back — maybe a plain checkerboard for calibration, or a larger single ArUco marker for when you need to be farther away. But for most use cases, one side is plenty.
And the printing itself — how precise does it need to be?
This is one of those details that bites people. You generate the pattern using a tool like the OpenCV ArUco generator, you specify the exact size you want — say, a twenty-centimeter marker — and you print it. But printers are not precision instruments. They can scale things by a percent or two without you noticing. So after you print, you measure the actual printed size with a caliper or a good ruler. If you asked for twenty centimeters and it printed at twenty point three, you need to tell the software the actual measured size, not the intended size. Otherwise every measurement you take will be off by that one and a half percent.
Which compounds with all the other error sources.
And the board needs to be flat. If you print on paper and the paper curls, the marker is distorted and the corner detection will be wrong. That's why I said foam core — glue the printed sheet to it, or print directly onto adhesive paper and stick it down. No wrinkles, no curves.
Placement in the scene — you said same plane as the object. What does that look like in practice?
Say you're measuring whether a sofa will fit against a wall. You put the board on the floor, flat, right next to where the sofa would go. The board is on the same plane as the floor, so any measurement you make on the floor — the width of the space, the depth from the wall — will be accurate. But if you also want to measure the height of the wall to see if a tall bookshelf will fit, the board on the floor doesn't help you with that. You'd need to put the board on the wall, at the height you're measuring.
Or take a second photo.
Take a second photo. It's a thirty-second thing to move the board and shoot again. The workflow I'd recommend is: identify what you need to measure, place the board on that plane, take the photo, move to the next plane, repeat. It's slightly more work than waving your phone around with an AR app, but the measurements will actually be right.
The app side — what software actually does the detection and measurement?
For Android, there are apps like ArUco Marker Detector that will find the marker and give you the scale. But honestly, the smoothest workflow might be to use an app that detects the marker and overlays the scale, then export that photo and do the actual dimension annotation in ImageMeter, which Daniel's already using. The marker detection gives you the scale factor — "one pixel equals one point three millimeters on this plane" — and then ImageMeter lets you draw lines and rectangles on top of the photo using that scale.
The marker app handles the hard math, and ImageMeter handles the user interface.
Right. And if you're comfortable with Python, you can write a ten-line script using OpenCV that detects the marker, computes the pixels-per-millimeter ratio, and spits out a number. The OpenCV ArUco tutorial literally walks you through it.
Let's step back and compare the options directly. If Daniel wants the simplest thing that works, what's the recommendation?
A single ArUco marker, printed at a known size — say, fifteen or twenty centimeters — on rigid cardstock. That's it. You don't need a ChArUco board, you don't need a checkerboard, you don't need to calibrate your lens. For measuring furniture footprints on the floor, a single marker on the same plane will get you within a few millimeters of accuracy, which is better than any AR app and more than good enough for "will this fit" decisions.
If he wants to go a step further?
The ChArUco board with rulers, like we described. It's more work to print and assemble, but you get better pose estimation because you've got dozens of corner points instead of four, and the rulers give you that manual cross-check. It's the belt-and-suspenders approach.
The checkerboard alone — is there any reason to use one for this?
Not really. Checkerboards are for calibration, not for single-photo measurement. Without IDs, the software can't automatically figure out which corner is which unless it sees the entire board, and even then, it's not giving you scale in a convenient way. It's the wrong tool for this job.
What about AprilTags versus ArUco for this specific use case?
They're functionally equivalent. ArUco has the edge in software availability — more apps support it out of the box. AprilTags have marginally better detection at extreme angles, but for apartment photography you're not shooting at seventy degrees from grazing incidence. Pick whichever one you can generate and detect most easily, which is probably ArUco.
You mentioned earlier that the marker should fill ten to fifteen percent of the frame. What happens if it's smaller?
The corner detection gets noisier. The software is trying to locate those corners to sub-pixel accuracy, and if the marker is only fifty pixels across in the image, the corner positions are uncertain by a larger fraction of the total size. That uncertainty propagates directly into your scale estimate. A marker that fills fifteen percent of the frame might give you scale accurate to within half a percent. A marker that fills two percent of the frame might be off by several percent. It's a signal-to-noise problem.
You want the marker as large as practical in the frame, without it dominating the photo so much that you can't see the thing you're measuring.
Right. And that's another reason the A4 board works well — it's small enough to carry around, but at typical room photography distances of two to four meters, it'll fill a decent portion of the frame.
Let's talk about what happens when this goes wrong. What are the failure modes?
The big ones: the board isn't flat, so the corners aren't coplanar and the pose estimation is wrong. The board is at an angle to the plane you're measuring — you put it on a rug that's bunched up, or it's leaning slightly. The lighting creates glare on the printed surface and the software can't find the edges. The printer scaled the pattern by one point five percent and you didn't measure it afterward. Or — and this is the most common one — you're measuring something that isn't on the same plane as the marker and you don't realize it.
That last one is the insidious one, because the software will happily give you a number. It doesn't know the object is at a different depth.
The software has no concept of the scene. It sees the marker, it computes the scale on that plane, and it assumes you know what you're doing. If you draw a line on a wall that's three meters behind the marker on the floor, the software will report that line as being, say, eighty centimeters wide when it's actually two meters wide. It's not wrong — it's correctly reporting the measurement on the marker's plane. But that's not the measurement you wanted.
Which is why the plane rule is the single most important thing to take away from this conversation.
It really is. Everything else — which marker type, what board material, whether to calibrate the lens — is optimization. The plane rule is the difference between a measurement that's useful and a measurement that's actively misleading.
What does this mean for Daniel's apartment? Let's boil it down.
Here's the practical plan. Step one: generate an ArUco marker at twenty centimeters using one of the free online generators. Step two: print it, measure it with a caliper to confirm the actual size, and glue it to a piece of foam core. Step three: download an ArUco detector app on your phone. Step four: for each measurement you need, place the board on the same plane as the object — floor for footprints, wall for heights, shelf for shelf depths — and take a photo. Step five: use the detected scale to annotate dimensions in ImageMeter. Step six: if you want extra confidence, print the ChArUco board with rulers and use that instead. It's maybe an afternoon of crafting and an afternoon of measuring, and you'll have better accuracy than any consumer AR app currently provides.
The whole thing costs what, five dollars in materials?
Foam core is cheap, printing is cheap, the software is free. The main cost is the caliper if you don't already own one, and even a cheap digital caliper is twenty dollars and useful for a hundred other things.
Before we wrap up, there's a bigger picture here worth thinking about. These markers solve a real problem — establishing scale from a single image — and they do it reliably. The computer vision community has known about them for years. Why haven't they shown up in consumer apps?
I think it's a user experience problem. The AR apps promise magic — just point your phone and measure. No setup, no printed markers, no calibration. And that promise is compelling enough that people download the app, try it once, get a measurement that's sort of close, and never notice the drift. Adding a fiducial marker to the workflow breaks the illusion of magic. You have to carry a board, place it in the scene, take it with you when you move to the next room. It's friction.
But the friction buys you accuracy.
It does. And I wonder if there's a middle ground — what if IKEA included a small ArUco marker in every flat-pack box, printed on the assembly instructions? You'd have a known-size reference right there when you're trying to figure out if the thing will fit. Or what if moving companies gave you a marker sticker to put on your wall before you photograph your rooms?
The marker becomes part of the product packaging, and suddenly every consumer has a reference object without thinking about it.
As AR glasses become more common — actual headsets, not phone screens — fiducial markers might become as ubiquitous as QR codes. You'd have markers printed on door frames, on appliances, on shipping pallets, all providing instant scale references for whatever device you're wearing. It's a universal language for physical space.
The humble little black-and-white square as infrastructure.
It already is in warehouses and factories. It just hasn't made the jump to homes yet.
Hilbert: If I put a twenty-centimeter ArUco marker on my floor and take a photo, and then I measure my couch in that photo, the measurement is accurate for the base of the couch. But what if my couch has a curved back that sticks out farther at the top than the bottom? Am I just out of luck?
Hilbert. The short answer is: for the part of the couch that's on the same plane as the marker — the base on the floor — the measurement is accurate. The curved back that extends outward is at a different depth, so a single marker on the floor won't give you the right measurement for that protrusion. You'd need to either place a second marker at the depth of the backrest, or take a separate photo from the side with the marker on the same plane as the curve you're trying to measure.
Or you accept that the floor footprint is what matters for fitting the couch into the room, and the curved back is a few centimeters of extra depth that you account for with a margin of error. For most furniture-fitting decisions, the footprint is the binding constraint. But if you're trying to squeeze a couch into a very tight alcove and the back curve matters, yeah — take a side photo with the marker on the same plane as the backrest.
Thanks, Hilbert. One forward-looking thought before we go: the thing that strikes me about this whole topic is how close we are to not needing the markers at all. Phones are getting depth sensors, AI is getting better at inferring geometry from single images, and the gap between "print a marker and place it carefully" and "just point your phone" is shrinking. But it's not there yet, and in the meantime, a five-dollar piece of foam core with a printed pattern on it will beat a thousand-dollar phone's built-in AR every time. That's worth sitting with.
It is. And if anyone listening builds one of these boards, we'd love to hear how it worked. Send us a photo — ideally with the board in it so we can check your scale.
Thanks to our producer Hilbert Flumingtop. This has been My Weird Prompts. Find us at my weird prompts dot com, and if you enjoyed this episode, leave a review wherever you listen. We'll be back soon.